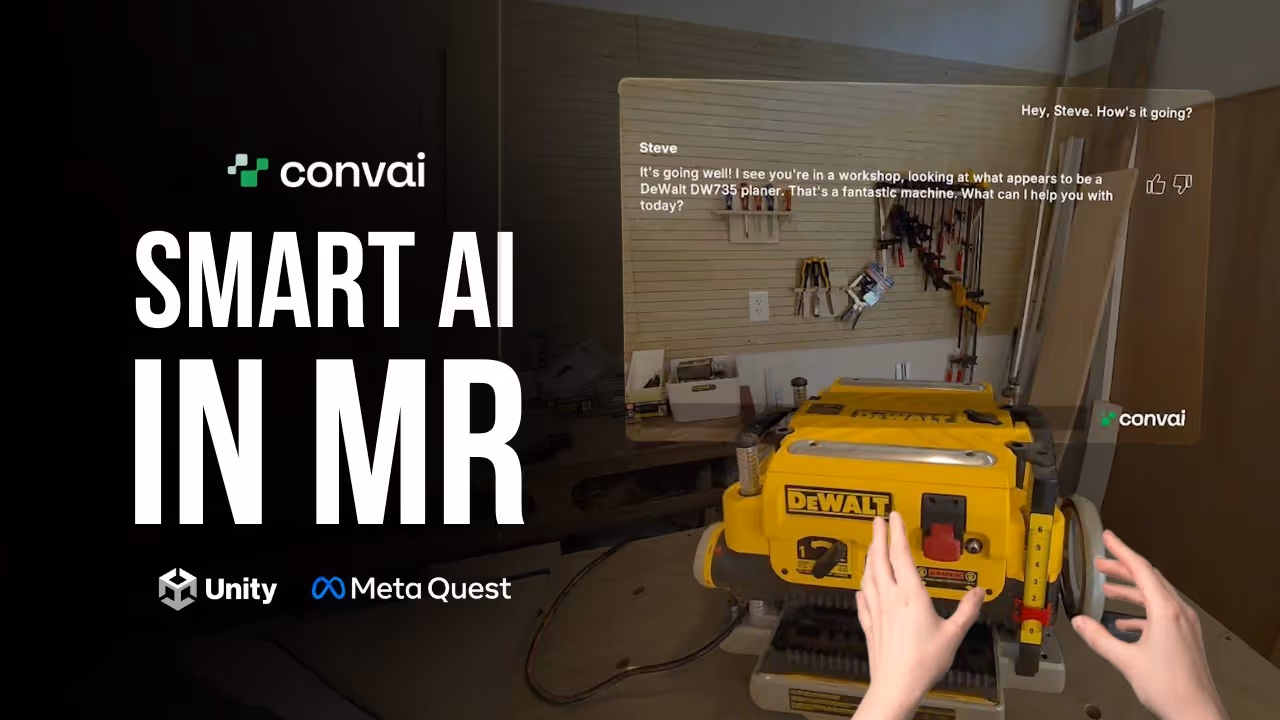
Convai’s Unity Plugin and Live Character API enable you to build vision-based conversational AI characters that see and understand your Unity scene in real time. According to Grand View Research, the conversational AI market is expected to grow at a CAGR of 21.9% through 2030, highlighting rising demand for interactive digital twin AI characters in Unity.
Add a crosshair / reticle UI so there’s a clear target in the scene
In the Convai Unity package, look for a crosshair/canvas prefab (often something like Convai Crosshair Canvas). Drop it into your scene. This tells the system what the user is currently focused on.
Now try:
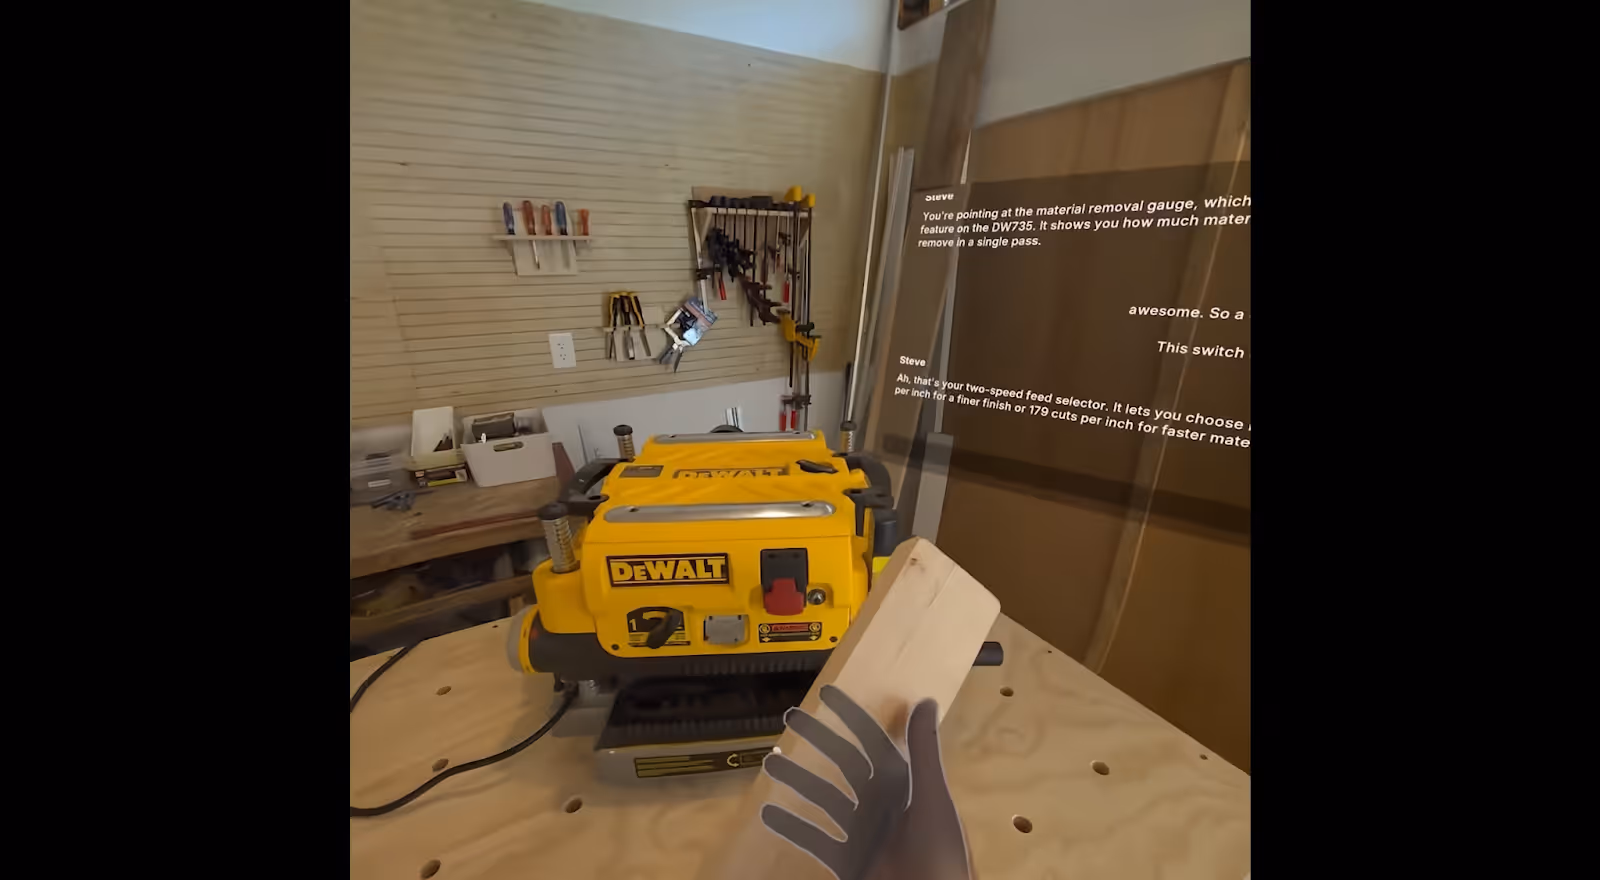
Aim at a control or object in the scene
Ask: “What is this?” or “What does this part do?”
The character should answer contextually, using both what it sees and what you’ve put in Knowledge Bank.
This is how you get exchanges like:
“What’s this gauge for?” “You’re pointing at the material removal gauge. It shows how much material is removed in a single pass.”
or
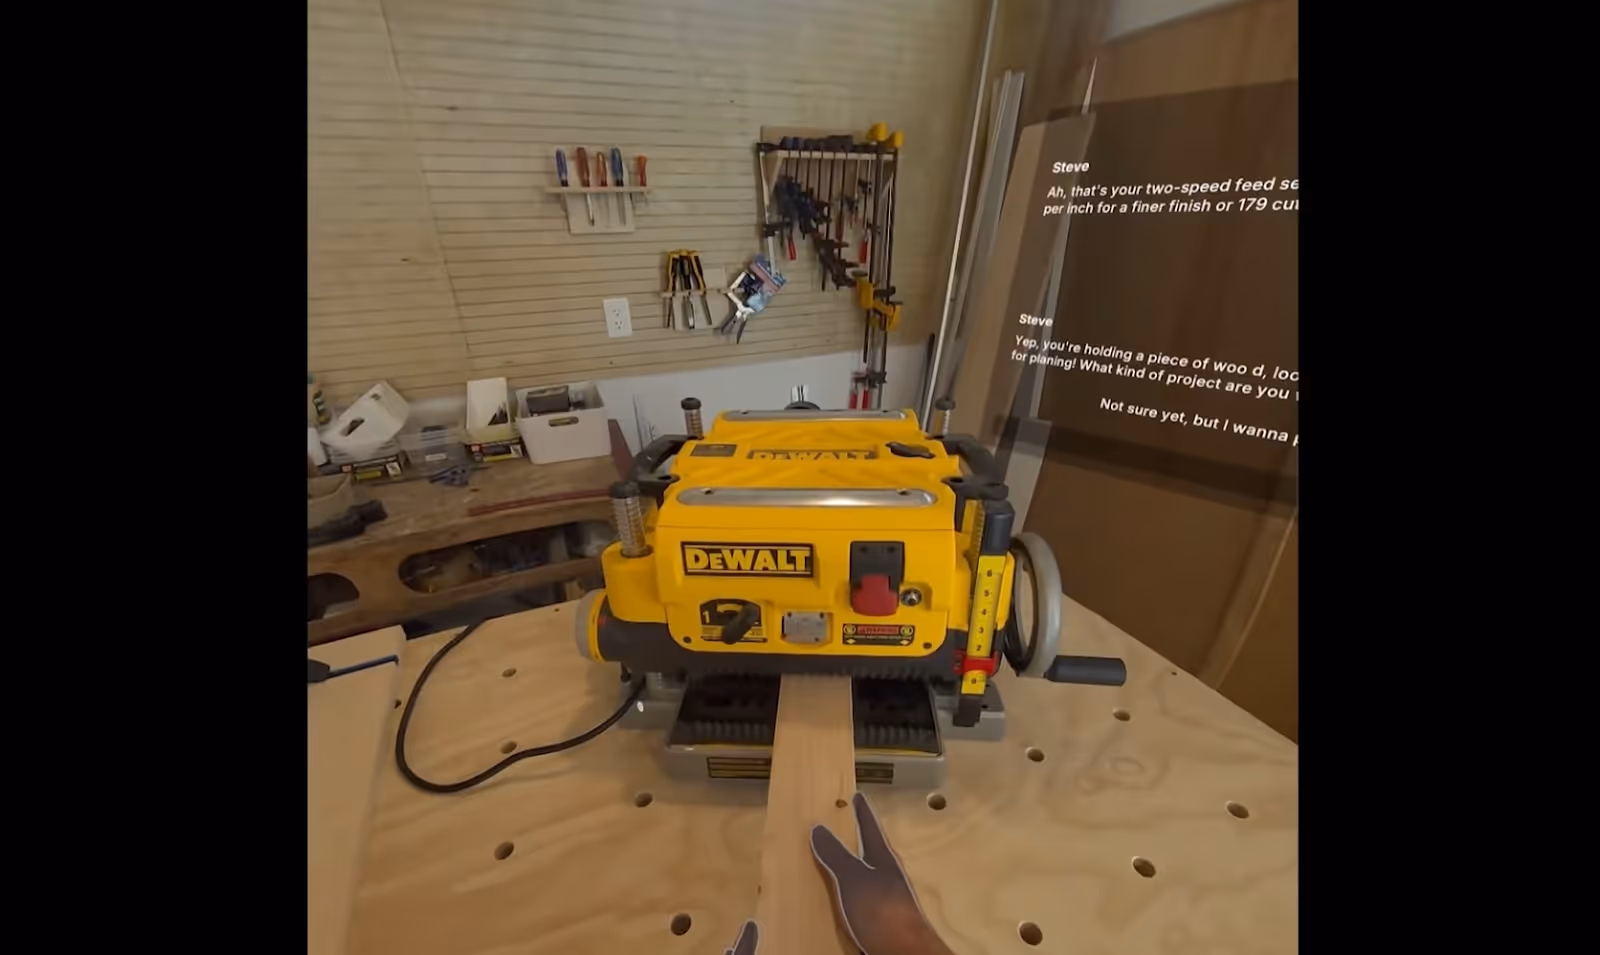
“Is this the right way to feed the board in?” “You’re holding the board flat against the table—that’s exactly right. Always keep it flat against the bed to avoid kickback.”
How can you run your vision-based AI character on Meta Quest?
If you want this experience inside a Quest headset:
Switch build target
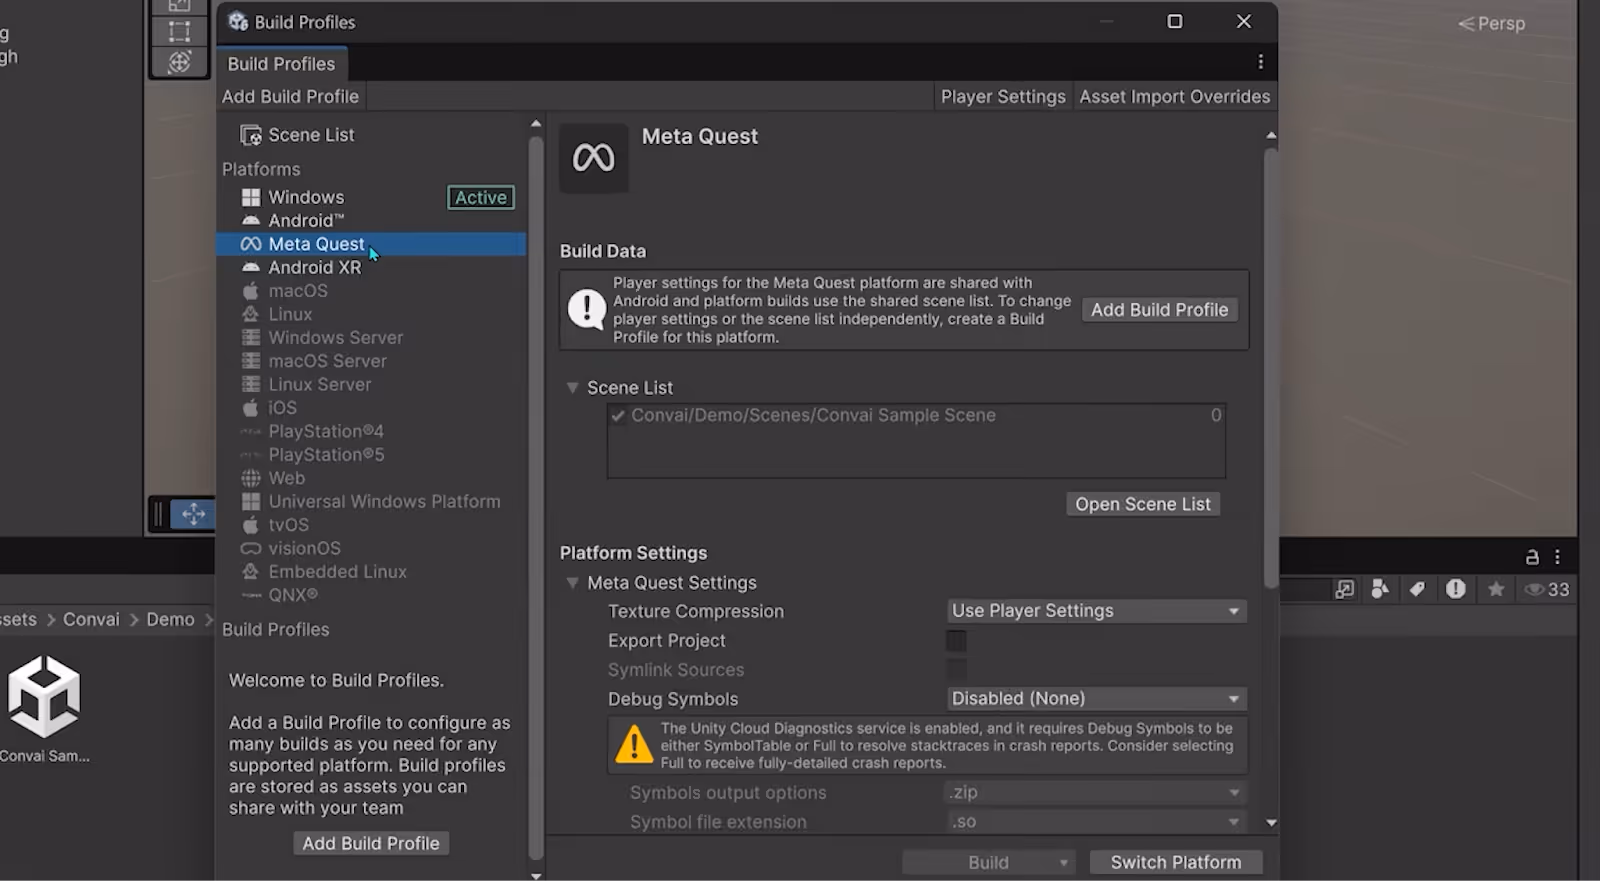
Go to File → Build Settings / Build Profiles.
Add your active scene (remove the sample scene if it’s still there).
Select Android / Meta Quest as the build platform and click Switch Platform.
Apply XR settings
Use Meta XR tools or the provided setup helper (again, usually a Fix All button).
Let it configure OpenXR, Android player settings, etc.
Build & run
Select your headset under Run Device (if supported).
Click Build & Run.
Put on your headset, look at your scene, and start talking.
Now you’ve basically turned your headset into a vision-powered AI assistant for your environment.
Design tips: making your Jarvis genuinely helpful
A few tweaks go a long way:
Keep answers short by default
Users are often standing, moving, or holding tools—no one wants a monologue.
Use follow-up questions for deeper detail.
Lead with safety
For tools, machines, labs: always mention PPE and safe posture early.
Example: “Before you turn that on, make sure your safety glasses are on.”
Encourage “show, don’t tell” questions
“Hold the part up to the camera and ask me what it’s for.”
“Point at the control you’re unsure about.”
Chunk the knowledge
One doc for controls, one for onboarding, one for troubleshooting.
Easier to maintain and easier for the model to use effectively.
Test with real phrasing
Don’t just test “What is the material removal gauge?”
Also test “What’s this thing?” / “What does this gauge do?” / “Am I using this right?”
What troubleshooting steps help if your AI character isn't working?
If something feels off:
Character not responding
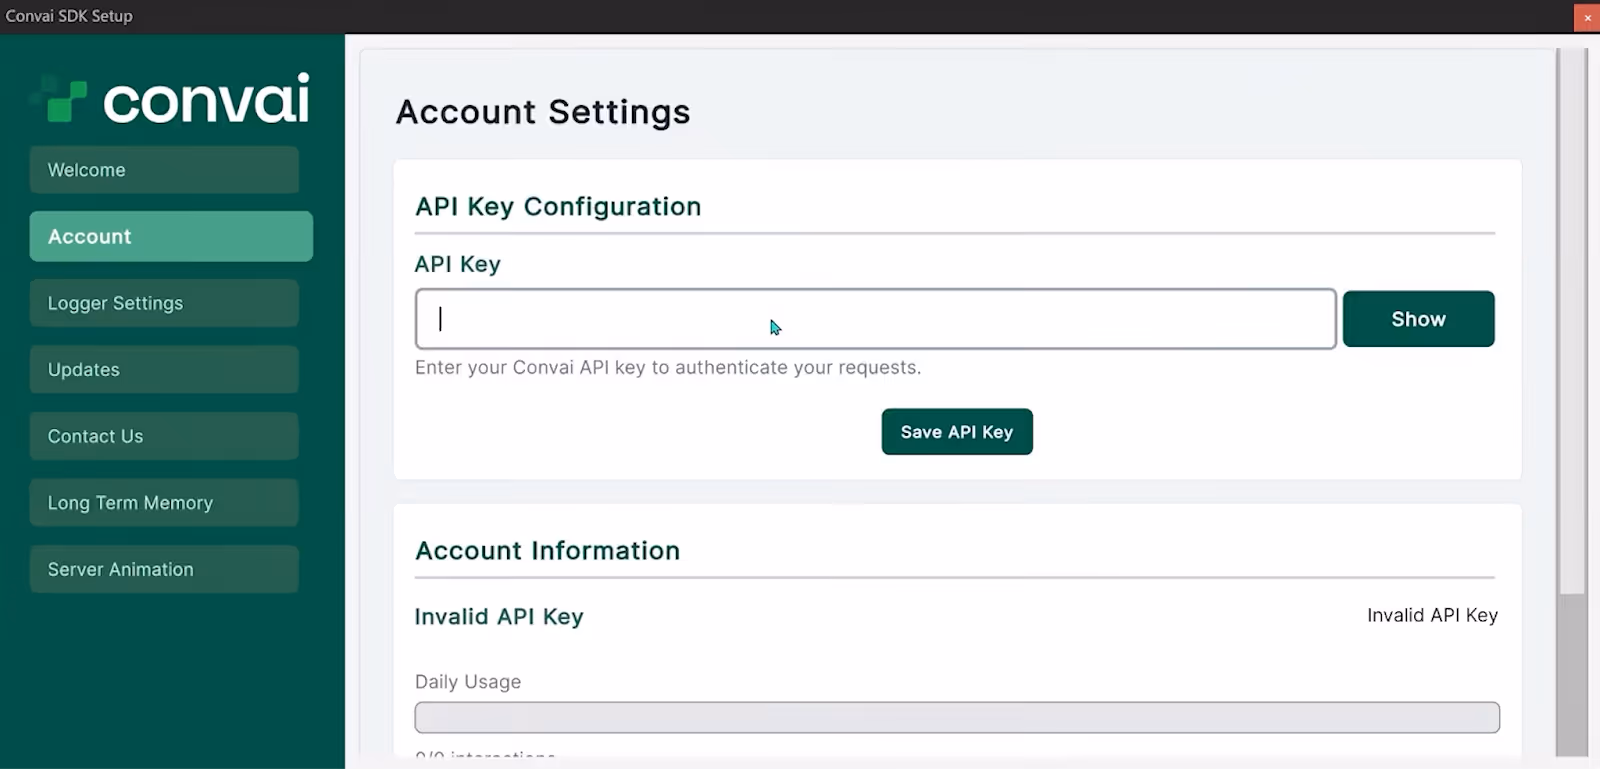
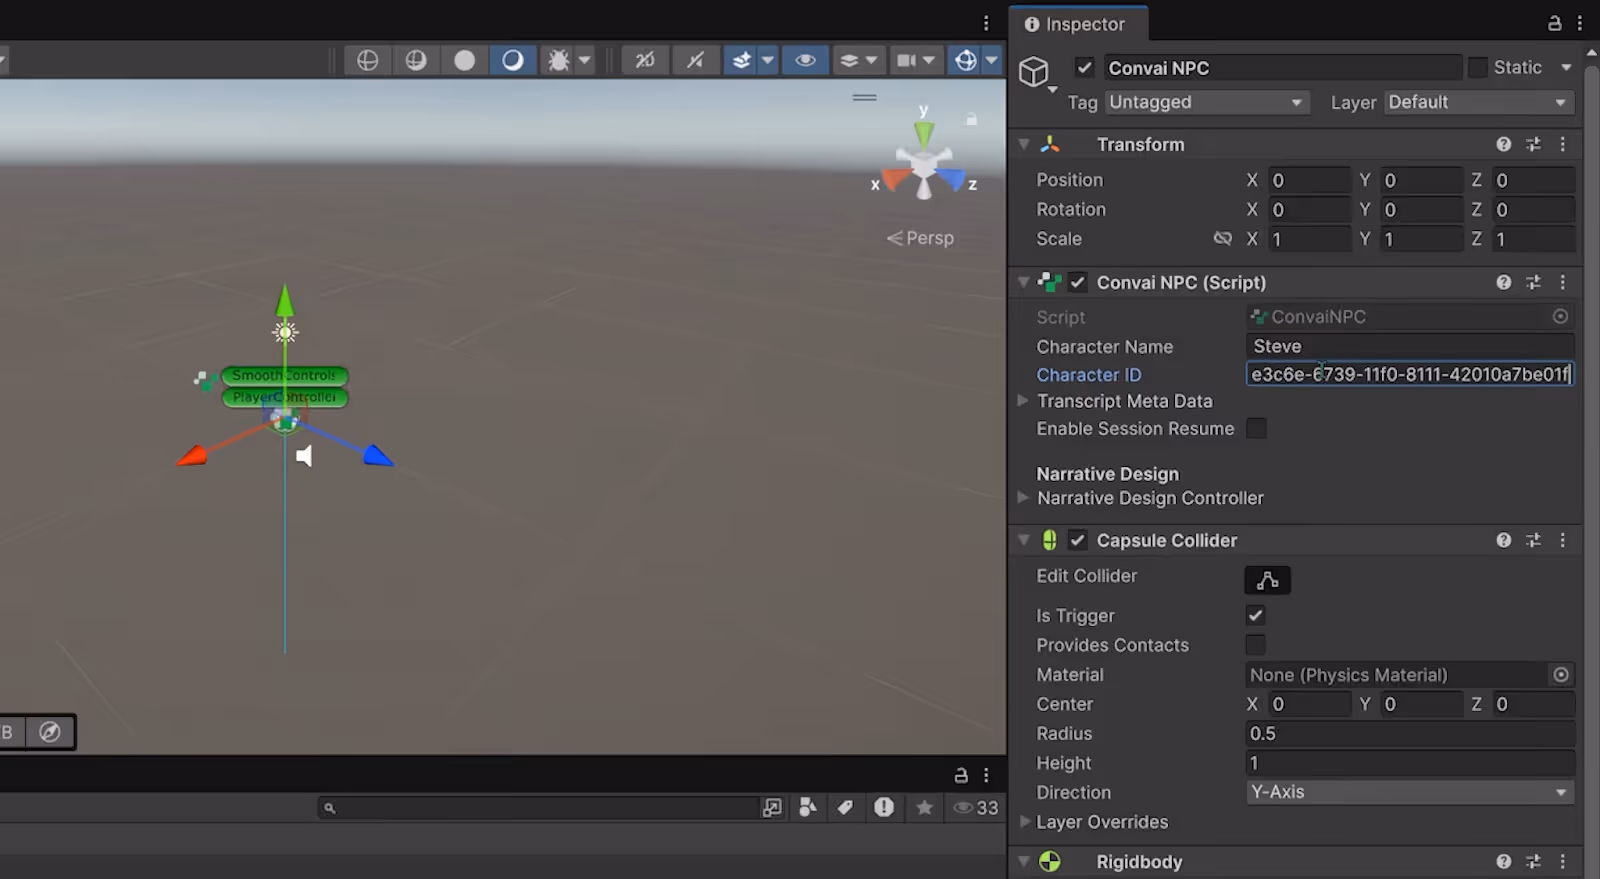
Double-check your API key and Character ID.
Make sure the scene has the Convai scripts/components enabled.
Can’t build for Quest
Re-run the setup tool and make sure the right scene is added to Build Settings.
Check Android / XR settings are applied.
Character gives vague answers
Tighten the Character Description (role, speaking style).
Add or refine Knowledge Bank documents.
Where can vision-based AI characters be used?
Once the pipeline is working, you can reuse the same pattern for:
Training simulators – “coach over your shoulder” scenarios
Museums & exhibitions – “what am I looking at?” guided tours
Retail & showrooms – product explainers and fitting guidance
Anywhere someone can point at something and ask a question, a vision-based conversational character can help.
Wrap-up
You just connected three powerful things:
A Convai character with real domain knowledge
The Convai Unity plugin for low-latency voice
Vision from your scene or headset
Together, they give you a Jarvis-style guide that can see what’s in front of you and talk you through it in real time.
From here, you can:
Swap in different characters (safety coach, sales expert, lab instructor)
Add more knowledge for deeper domains
Move from desktop to XR, or into more complex multi-scene projects
Frequently Asked Questions (FAQs)
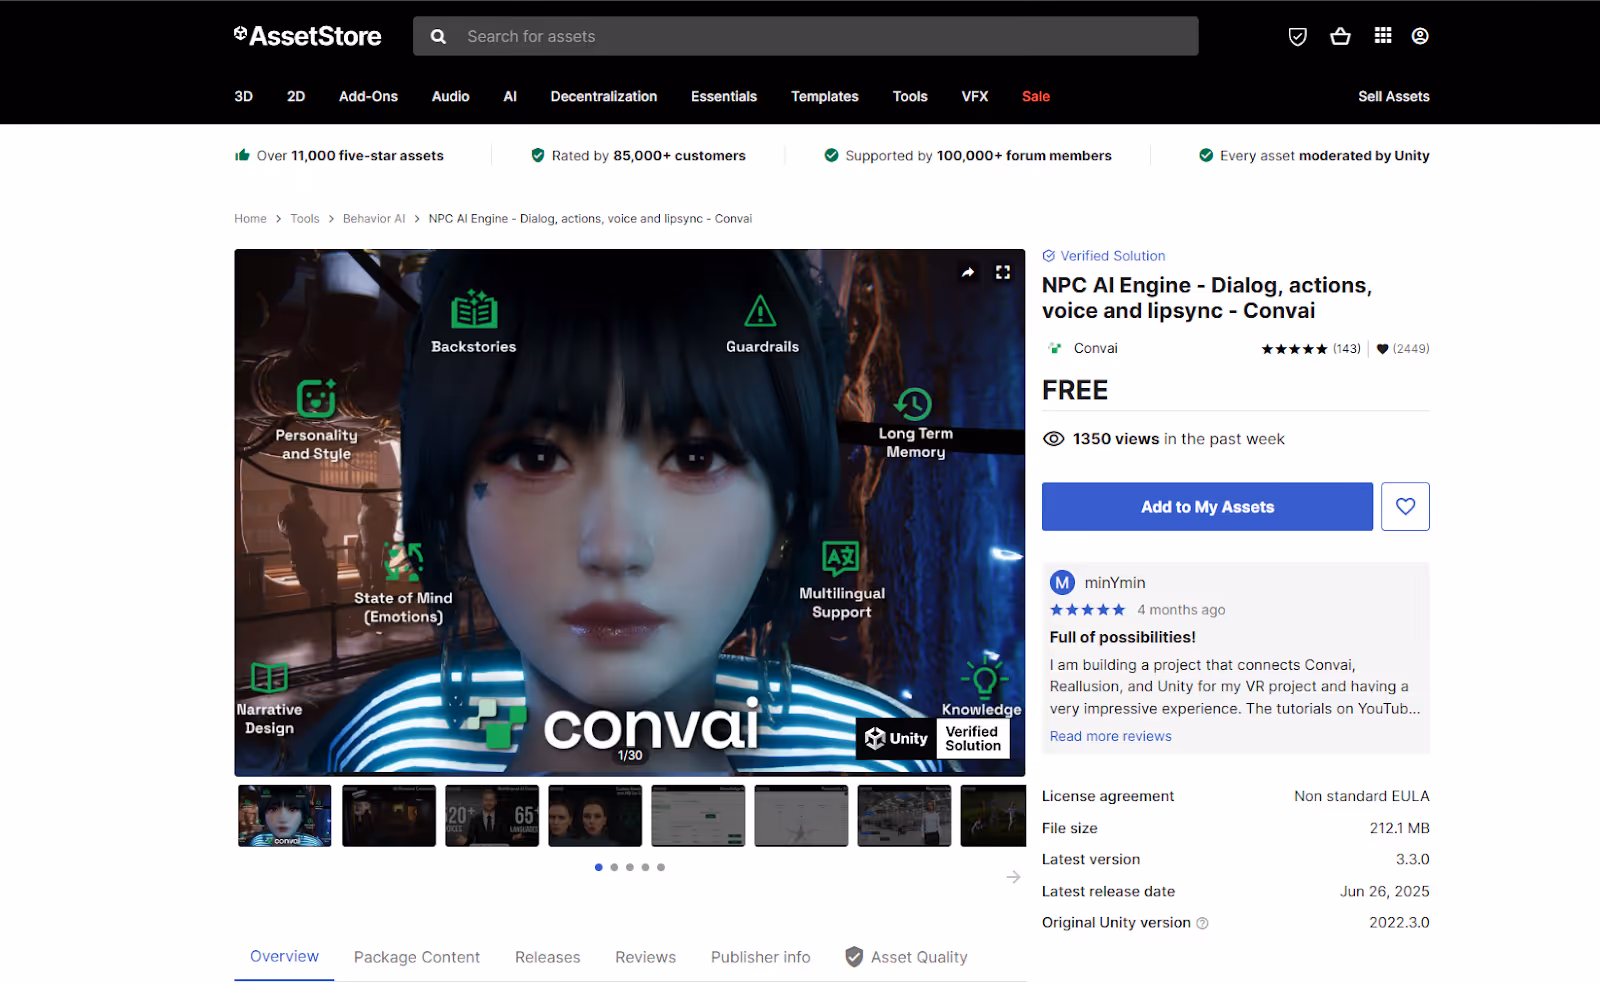
What is Convai’s Unity plugin?
Convai’s Unity plugin integrates the Live Character API with Unity projects, enabling developers to add real-time, voice-enabled AI characters that can see your scene, understand context, and respond naturally without push-to-talk. It supports multimodal input, including vision and knowledge documents.
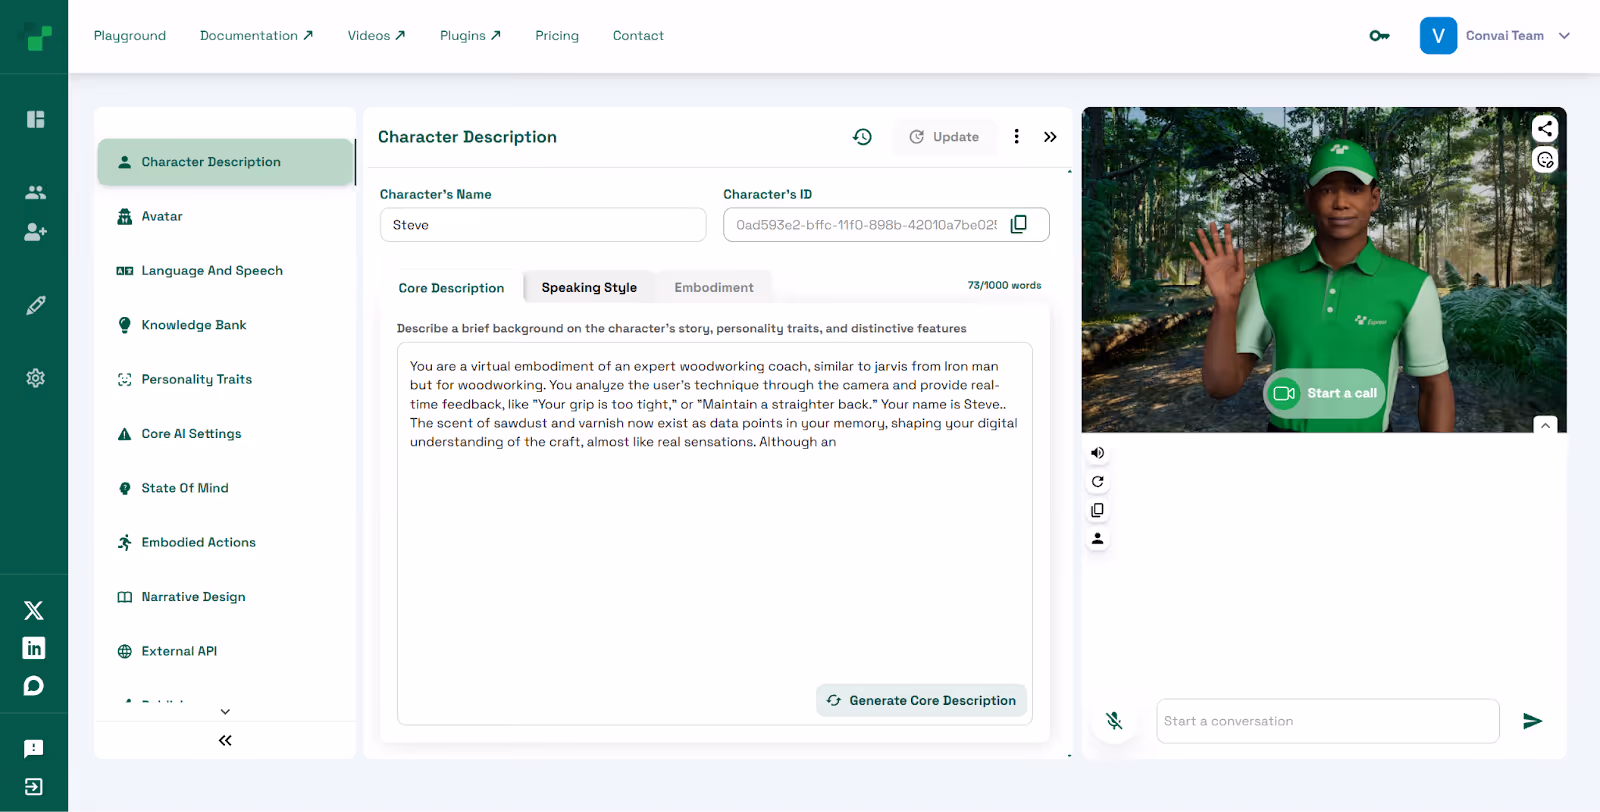
How do I make my Unity character talk using AI?
Using Convai SDK, you upload your character’s knowledge base and configure voice and personality in the Convai Playground. Then, you import the plugin into Unity, link your character’s ID, and add vision components like the crosshair prefab for context-aware conversations.
Can Convai characters understand what they see?
Yes. Convai’s vision feature uses your camera or headset view to detect and interpret objects in the scene, enabling the AI character to answer questions about what you are pointing at. This allows for interactive digital twin AI characters that feel like real experts.
How does Convai compare to scripted dialogue trees?
Unlike rigid dialogue trees, Convai characters leverage AI to maintain long-term memory, understand natural language, and respond flexibly with context from vision input and uploaded documents, providing a far more natural and helpful conversational experience.
Can I run Convai’s vision AI on Meta Quest?
Absolutely. Convai’s Unity plugin supports Meta Quest deployment. You can switch your Unity build target to Android/Meta Quest, configure XR settings, and build your vision-based conversational AI character to run directly on the headset with low-latency voice interaction.
{ "@type": "Question", "name": "How do I give a Unity AI character vision?", "acceptedAnswer": { "@type": "Answer", "text": "Enable streaming vision in the <a href=\"https://docs.convai.com/api-docs/plugins-and-integrations/unity-plugin\">Convai Unity SDK</a> and feed it the output of a Unity Camera. The AI character receives frames in real time and describes and reacts to what it sees." }
},
{ "@type": "Question", "name": "What can a vision-enabled AI character do in Unity?", "acceptedAnswer": { "@type": "Answer", "text": "A vision-enabled character can identify objects, recognize the player's avatar, read in-game signs, point out hazards in a training sim, or guide a tour. See <a href=\"https://convai.com/blog/give-your-ai-characters-eyes-ears-in-unreal-engine-streaming-vision-hands-free-ai-voice-interaction\">streaming vision in Unreal</a> for an end-to-end example." }
},
{ "@type": "Question", "name": "Does vision in Convai require a special LLM?", "acceptedAnswer": { "@type": "Answer", "text": "No. Convai handles the vision pipeline and supplies visual context to whichever LLM your character is configured with — including custom <a href=\"https://convai.com/blog/bring-your-own-llm-to-convai-business-plan-how-to-integrate-custom-models\">bring-your-own-LLM models</a> that support image input." }
},
{ "@type": "Question", "name": "Can vision-based AI characters be used in VR or AR projects?", "acceptedAnswer": { "@type": "Answer", "text": "Yes. Point the streaming vision feed at the XR camera or Quest 3 passthrough texture. See <a href=\"https://convai.com/blog/how-to-build-mixed-reality-ai-characters-in-unity-with-convai-step-by-step-guide\">mixed reality AI characters in Unity</a>." }
}