Use Cases

.jpg)
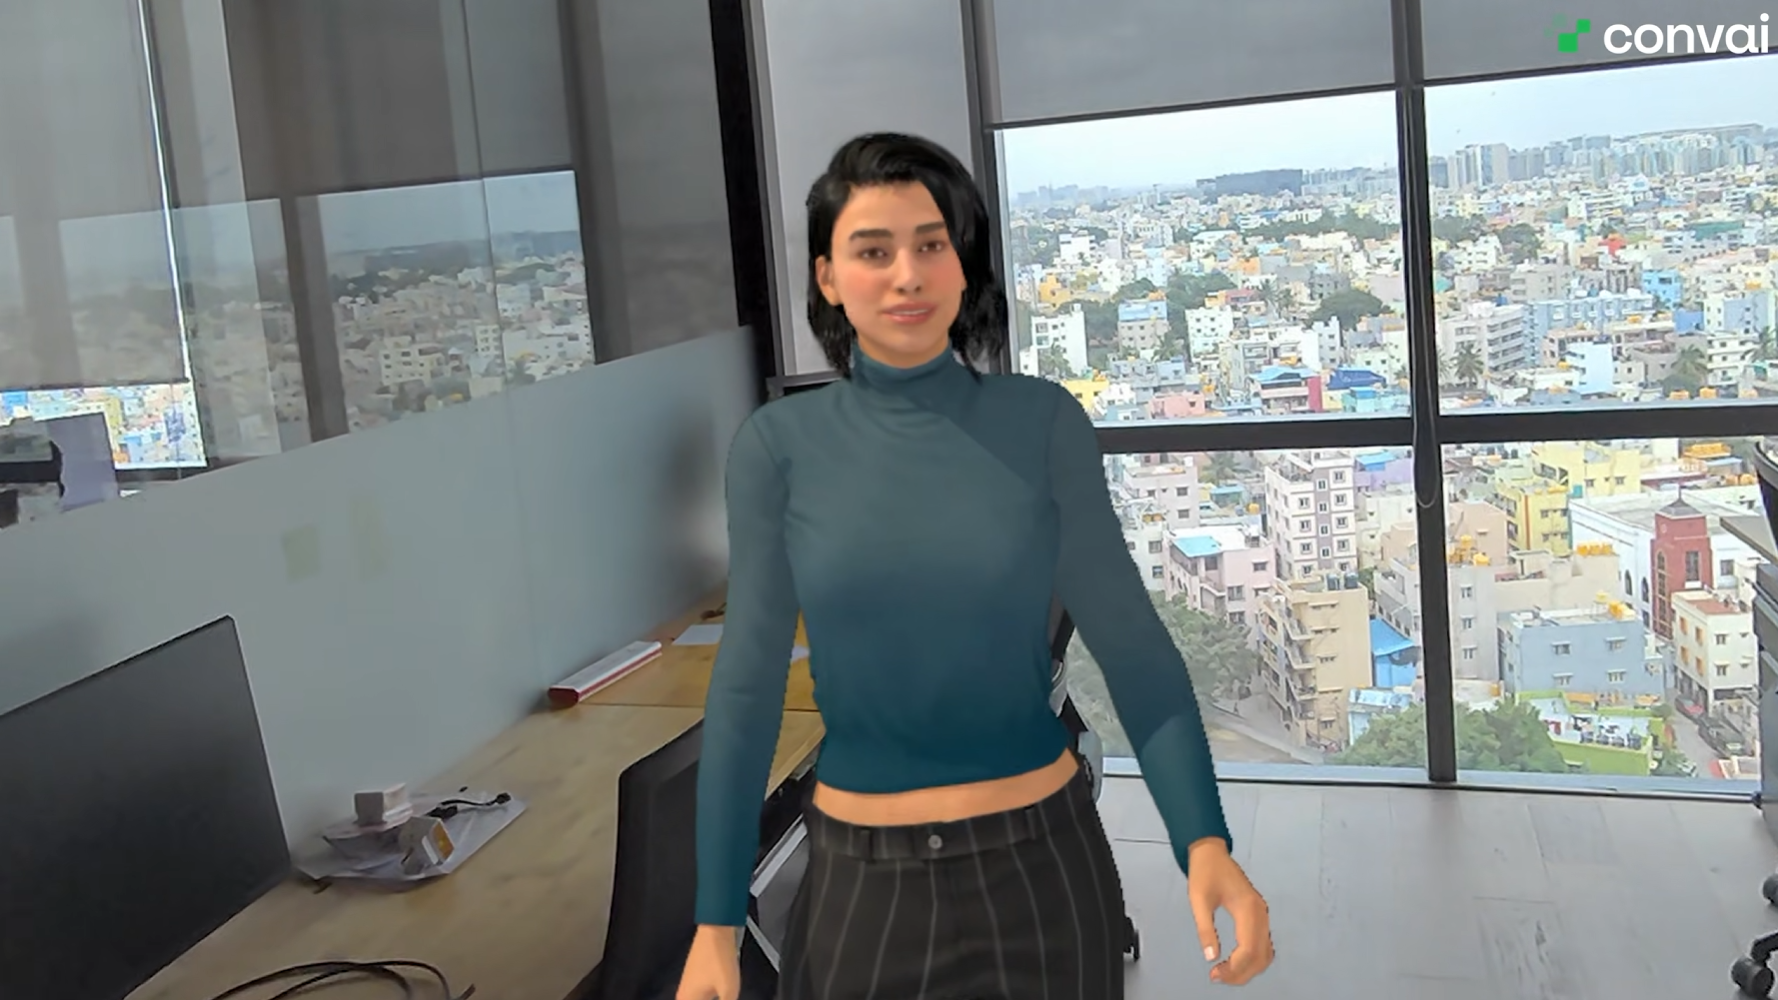
You can place a Convai-powered AI character in your actual living room, talk to it, ask it to move next to your real table, and have it describe the light coming through your windows. This tutorial builds that experience in Unity 6 using Unity's Mixed Reality Template and deploys it to Meta Quest.
Mixed reality puts embodied AI avatars and disembodied agents into the physical world, which makes them useful for training, assistance, education, and room-scale games in a way a flat screen can't reach. Over the next few minutes you'll set up an XR Origin, add the Convai Player component, spawn a Convai character at runtime with the Object Spawner, attach a world-space transcript UI, and build an APK for a Quest 3.
▶ Watch the full walkthrough below:
You can grab the Convai Unity plugin on the Asset Store.
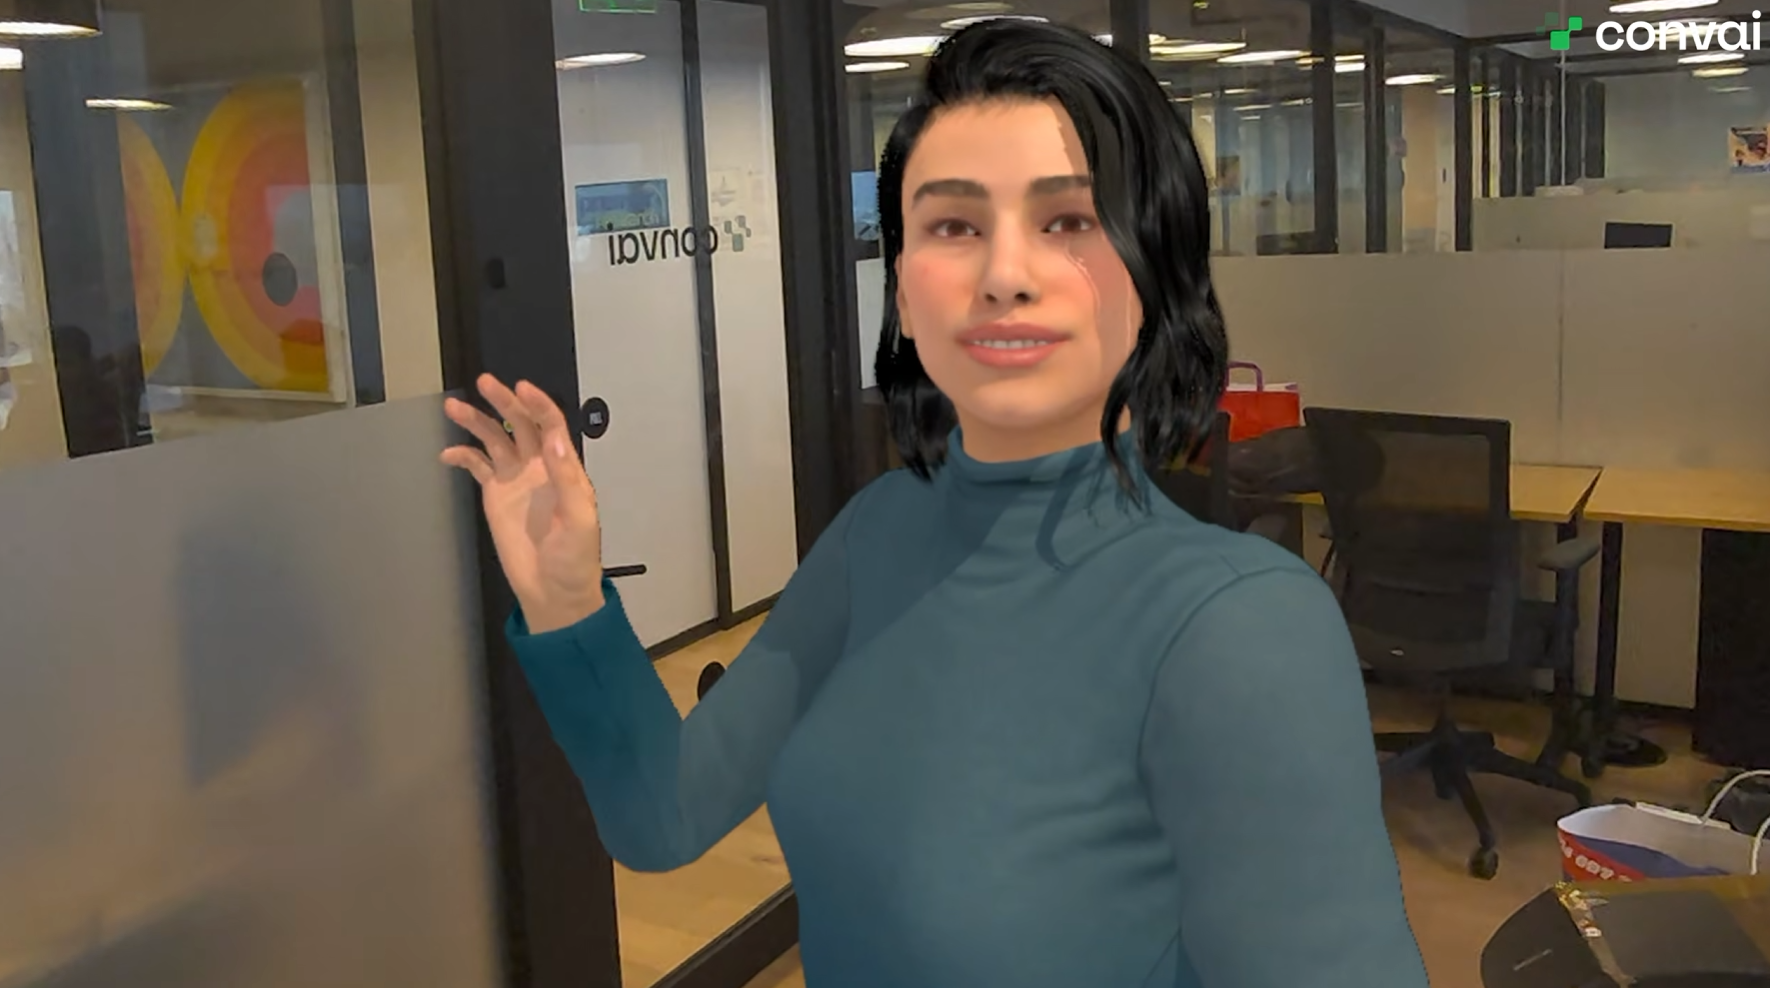
In the demo, the character holds a normal conversation, responds to spatial instructions, and comments on the physical room:
"Can you stand slightly closer to the table, please?" "Of course. I'll stand next to the table now."
"Can you tell me a bit about what you like in this room?" "Certainly, the tall curtained windows are a great feature, letting in a lot of daylight, which really brightens up the room."
Three things make that work. The character's brain stays hosted on Convai, so its personality, voice, knowledge, and reasoning arrive over the network rather than shipping inside the APK. Unity's Mixed Reality Template handles passthrough and spatial tracking, so the avatar occupies a real position in your room. And Convai's XR platform support carries voice conversation, lip sync, and the rest of the feature set onto the headset without special handling.
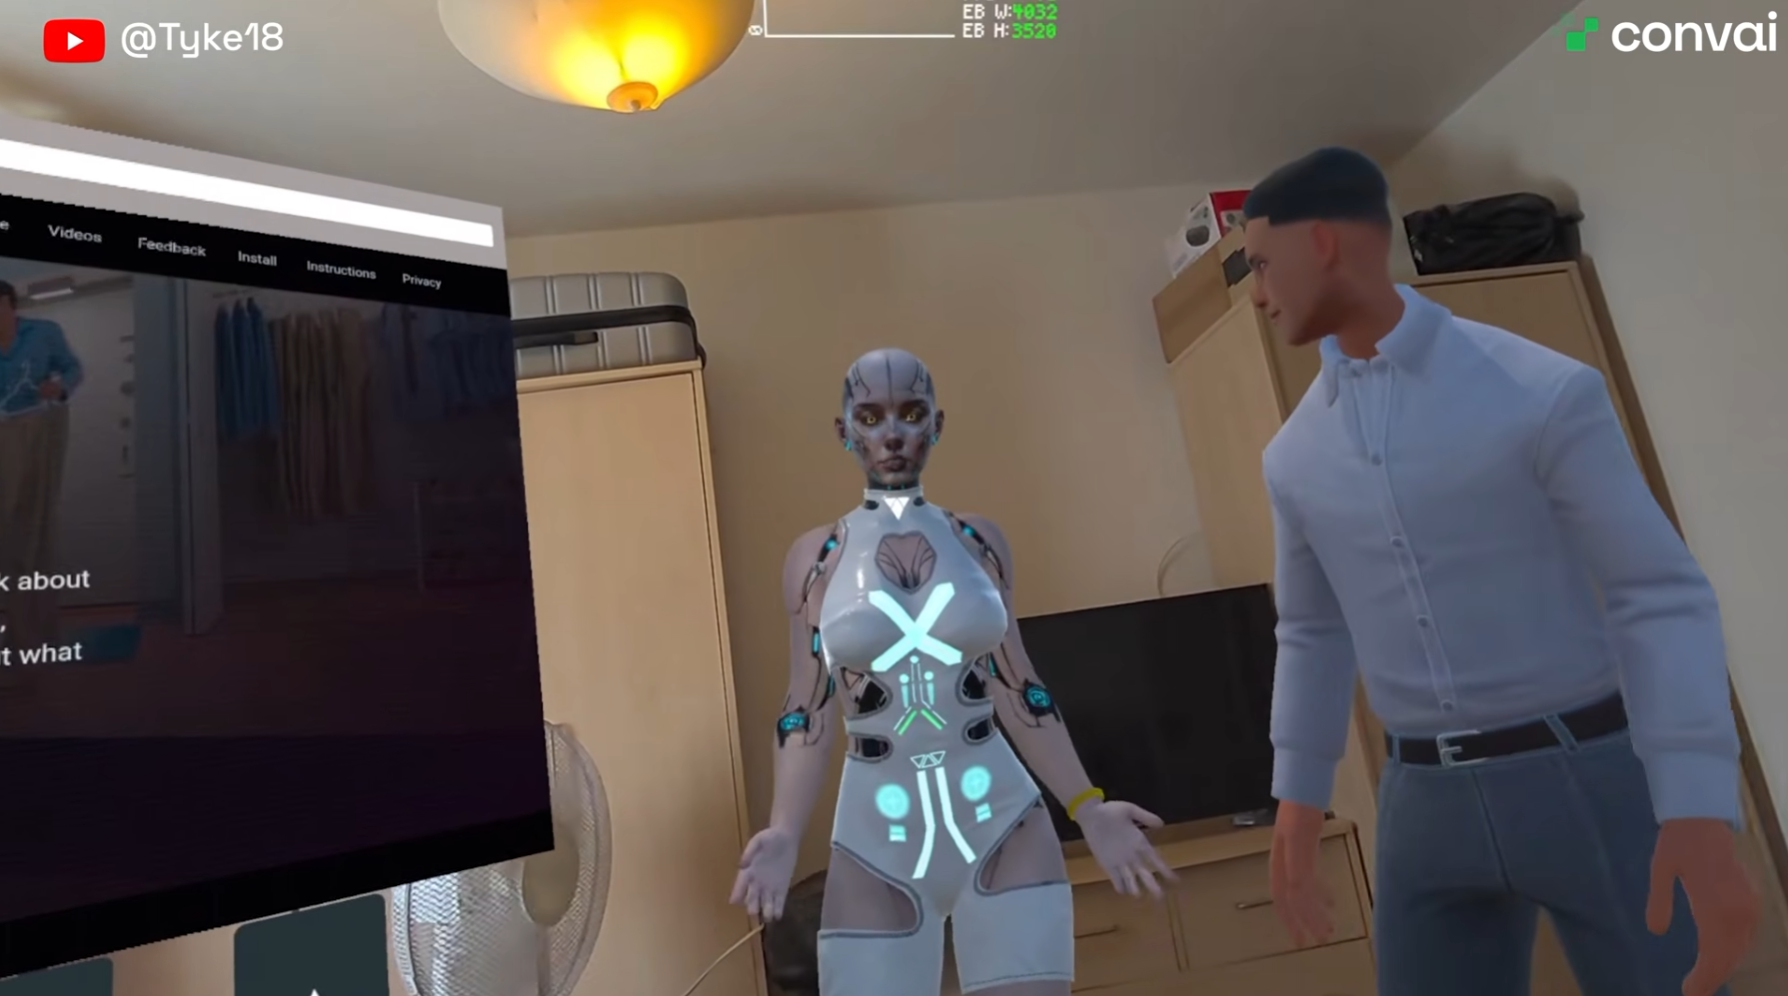
The Convai Unity SDK runs on Android-based XR headsets (Meta Quest, Horizon OS, Android XR) and on Windows XR headsets with no extra configuration for core features. Voice conversation, lip sync, actions, emotion, long-term memory, narrative design, and spatial audio all arrive at full support on both families of headset, behaving as they do on desktop.
Vision is the one feature that splits by platform, and only when you want the character to see the real world through the headset cameras. Quest 3 and Quest 3S get a ready-made QuestVisionFrameSource for the passthrough feed. Every other XR headset needs a custom IVisionFrameSource implementation, covered further down.
PwC's enterprise VR study gives the clearest numbers on why teams keep moving training into headsets: learners finished courses up to four times faster than in a classroom, reported 275% more confidence applying what they learned, and formed a 3.75x stronger emotional connection to the material. The economics follow the same curve, with VR reaching cost parity against classroom delivery at 375 learners and running 52% cheaper at 3,000.
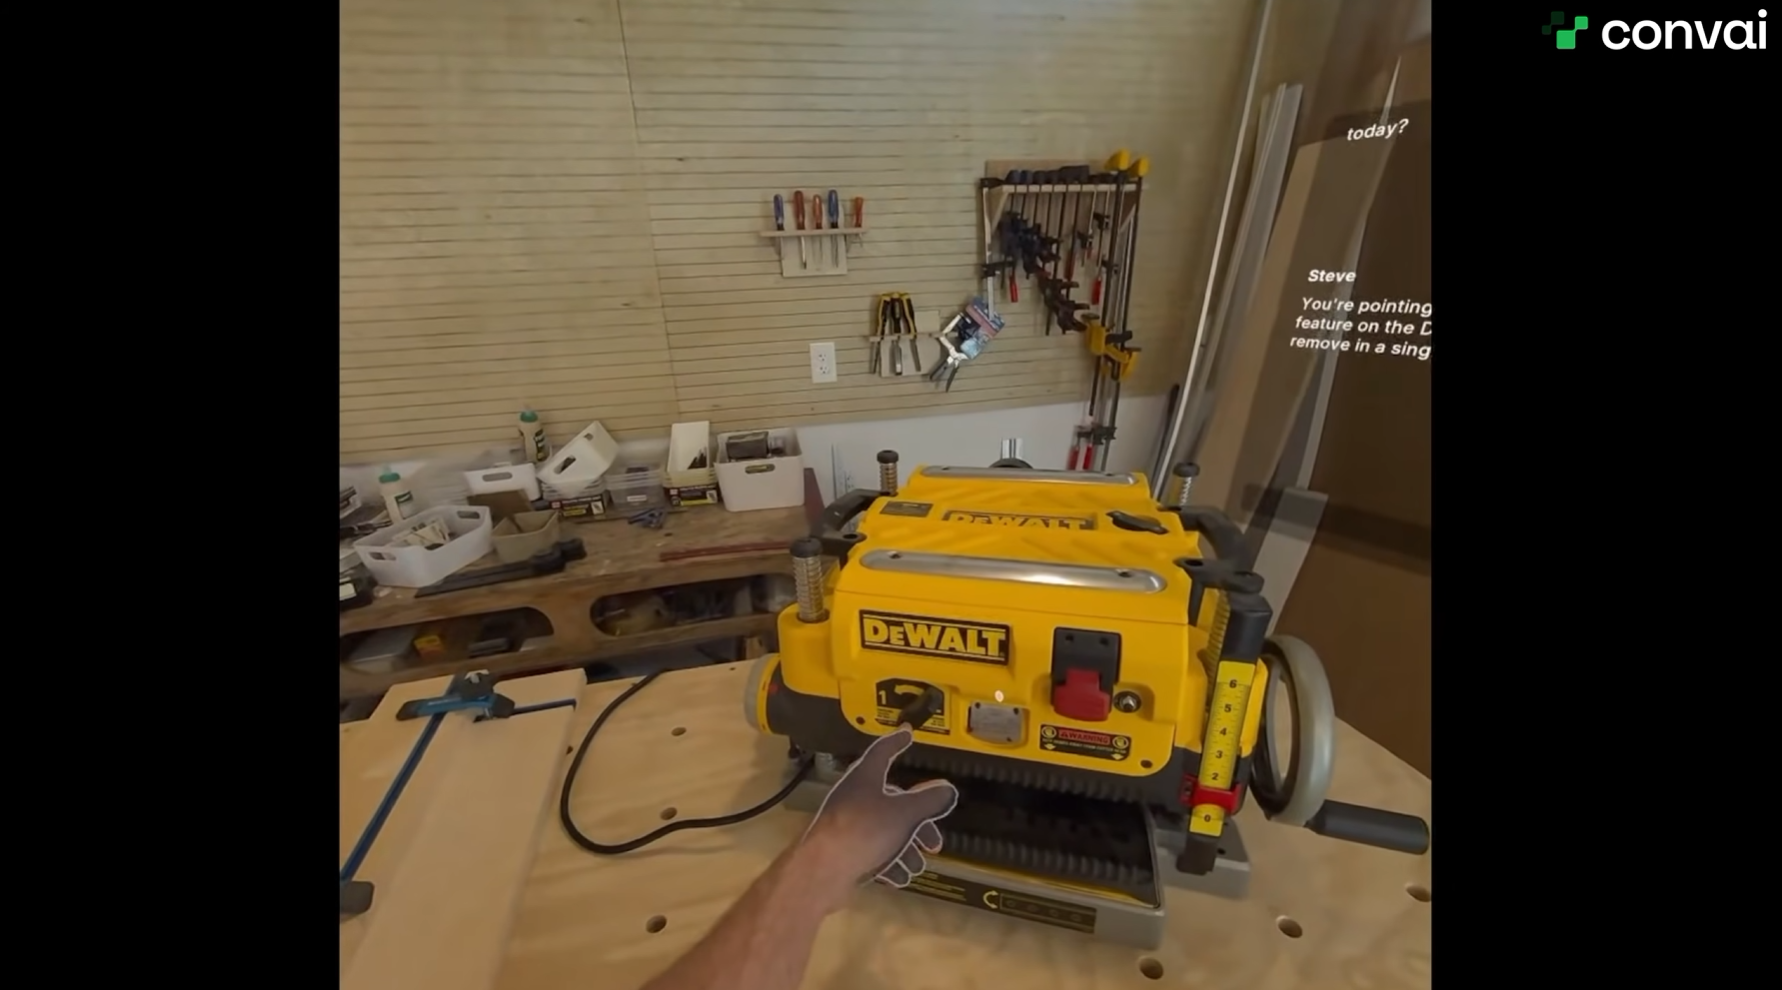
Add a conversational AI character to that and the simulation stops needing a scripted branch for every learner utterance. A trainee can ask the AI avatar an unanticipated question, point at a real object on the real workbench, and get a coherent answer. Mixed reality also keeps the physical environment in play, so muscle memory and spatial reasoning transfer straight to the job.
Four things:
The tutorial assumes the SDK work is already done and focuses only on the mixed reality layer.
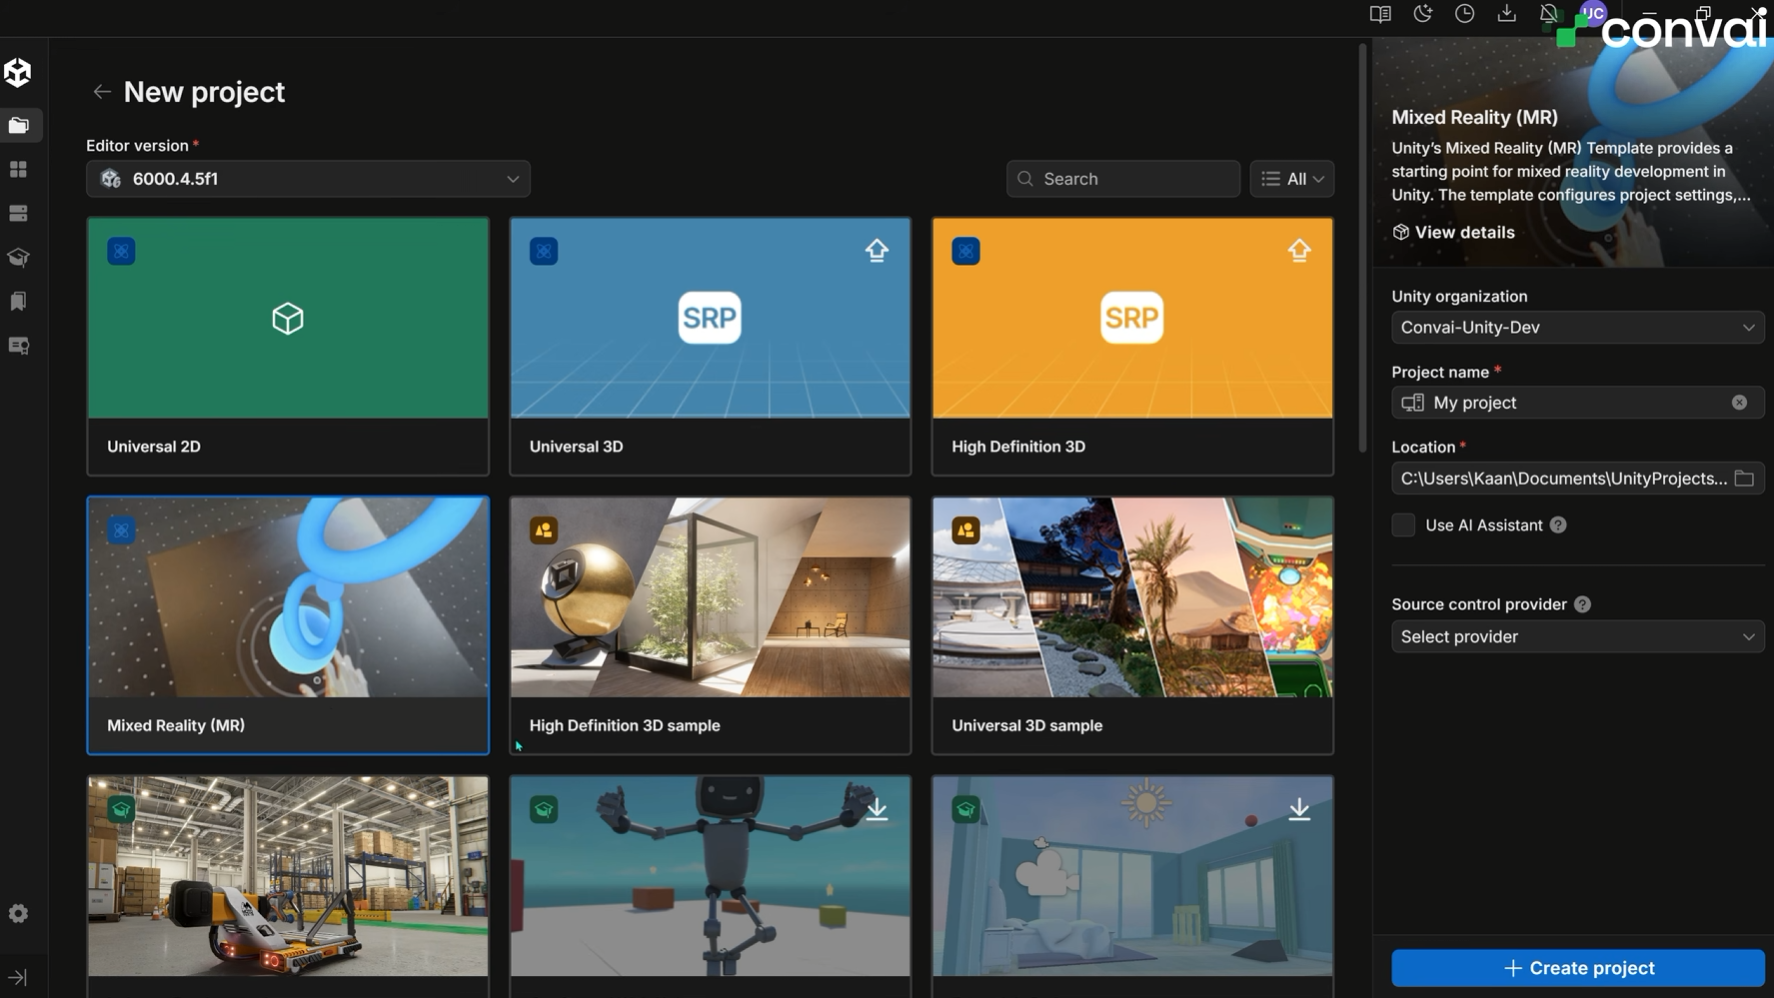
In Unity Hub, create a new Unity 6 project and select the Mixed Reality template. It ships the core XR and mixed reality setup this workflow depends on, including a pre-configured XR Origin and an Object Spawner. Name the project and create it.
Once it opens, go to Assets > Scenes and open SampleScene.
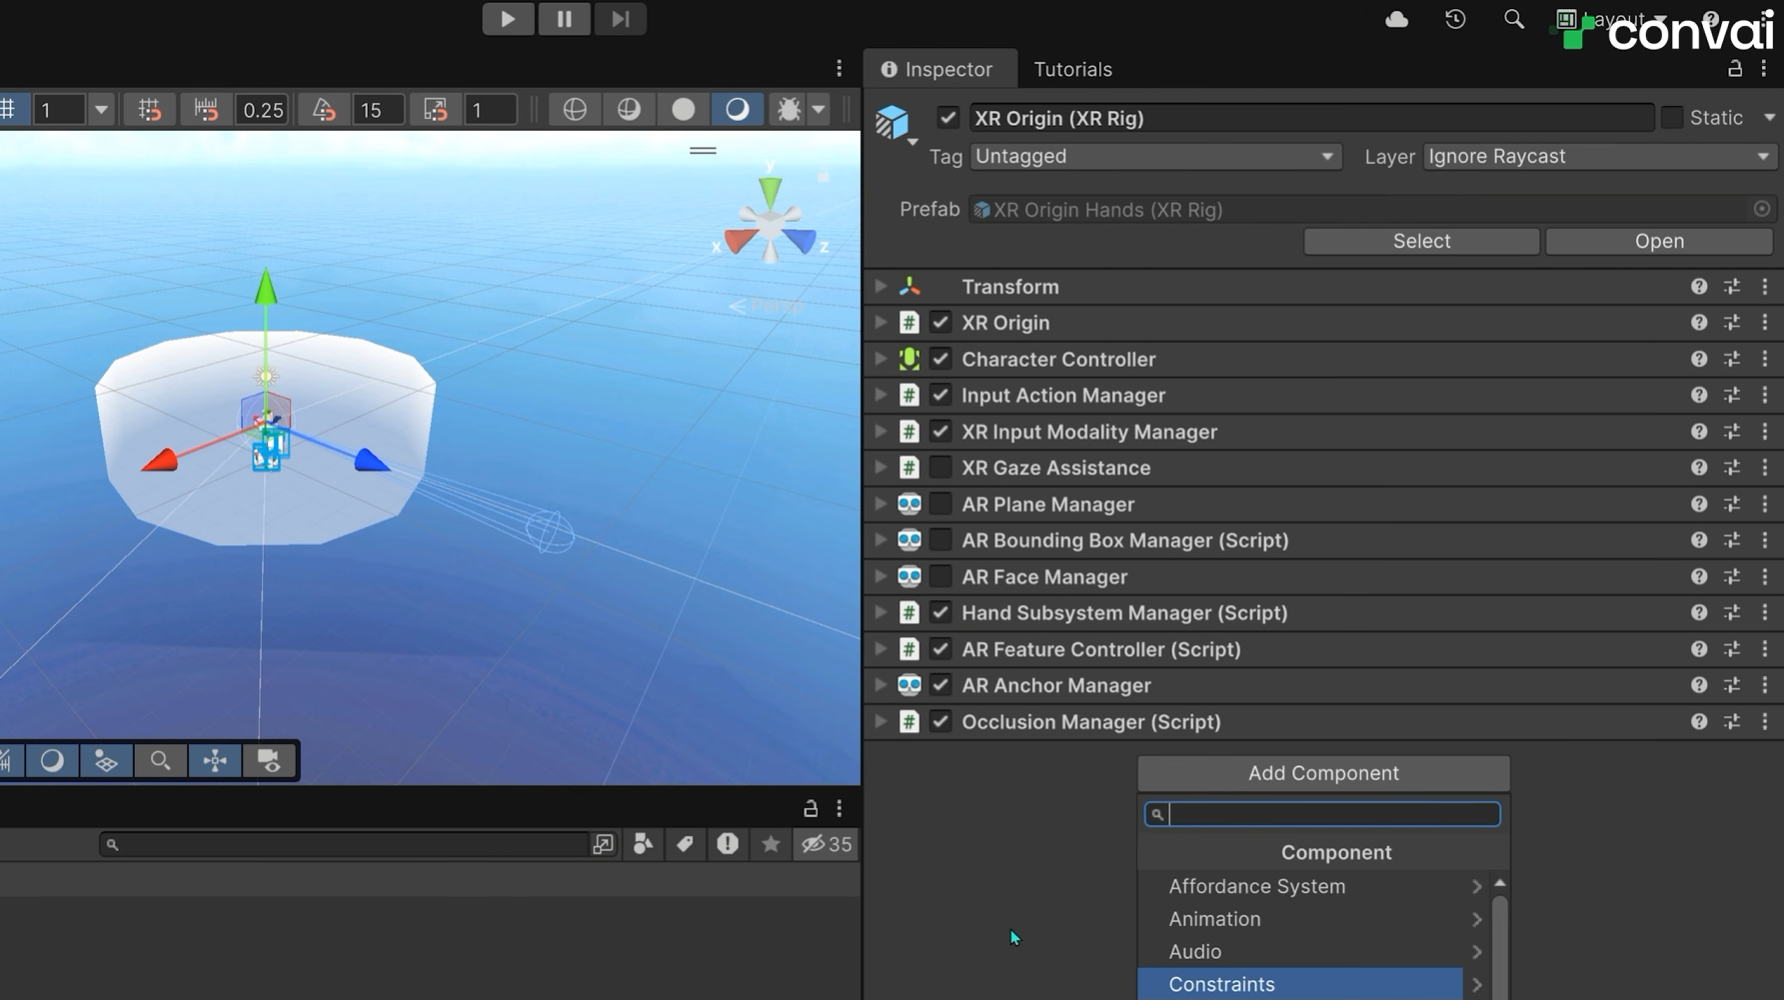
Select MR Interaction Setup in the Hierarchy, then select XR Origin. In the Inspector, add the Convai Player component. This tells Convai which object represents the human in the room, so the character knows who it's talking to and where that person stands.
Building a custom mixed reality project instead of using the template? Add the same component to your own player GameObject. Nothing else about this step changes.
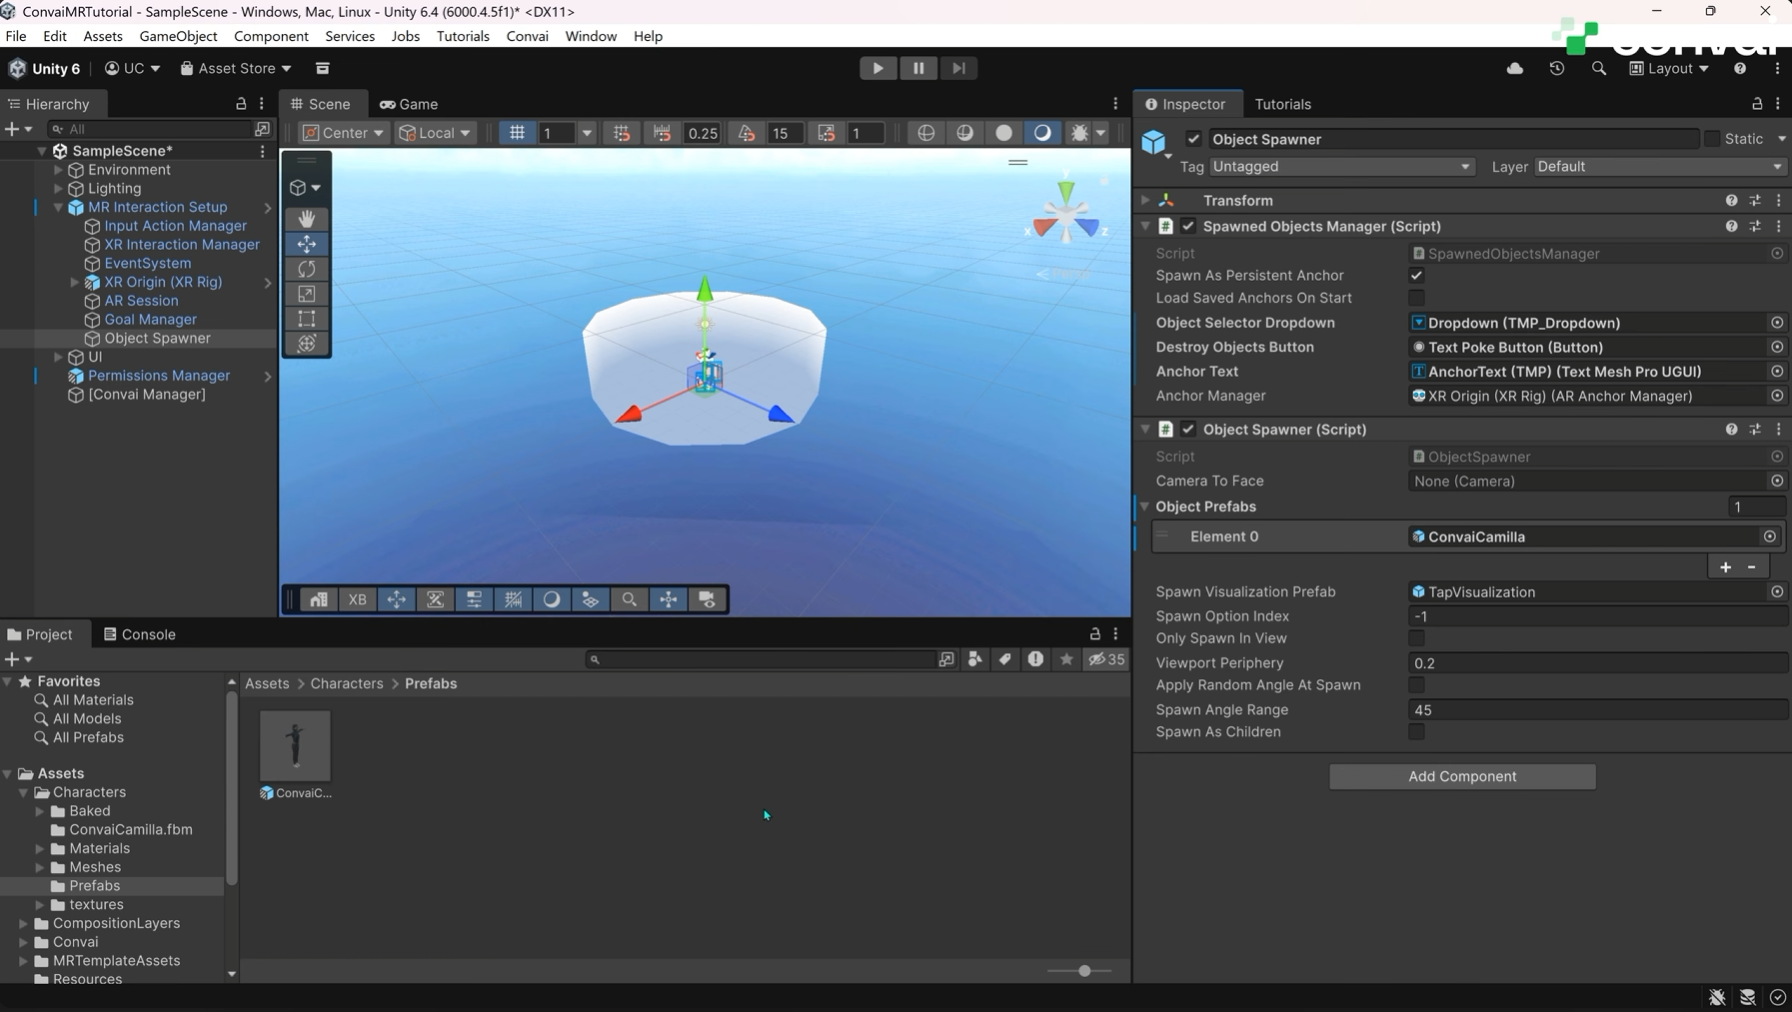
The Mixed Reality Template's Object Spawner places objects into the physical room where the user points. Point it at your character instead of the default cubes and spheres.
Select Object Spawner in the Hierarchy. In the Inspector, set the Object Prefabs array size to 0 to clear the defaults, then drag your Convai character prefab into the field. The spawner now creates the Convai character at whatever position the user selects in their real room.
Runtime spawning is a choice, not a requirement. You can place the character in the scene yourself, use your own spawning system, or instantiate the prefab from a custom script.
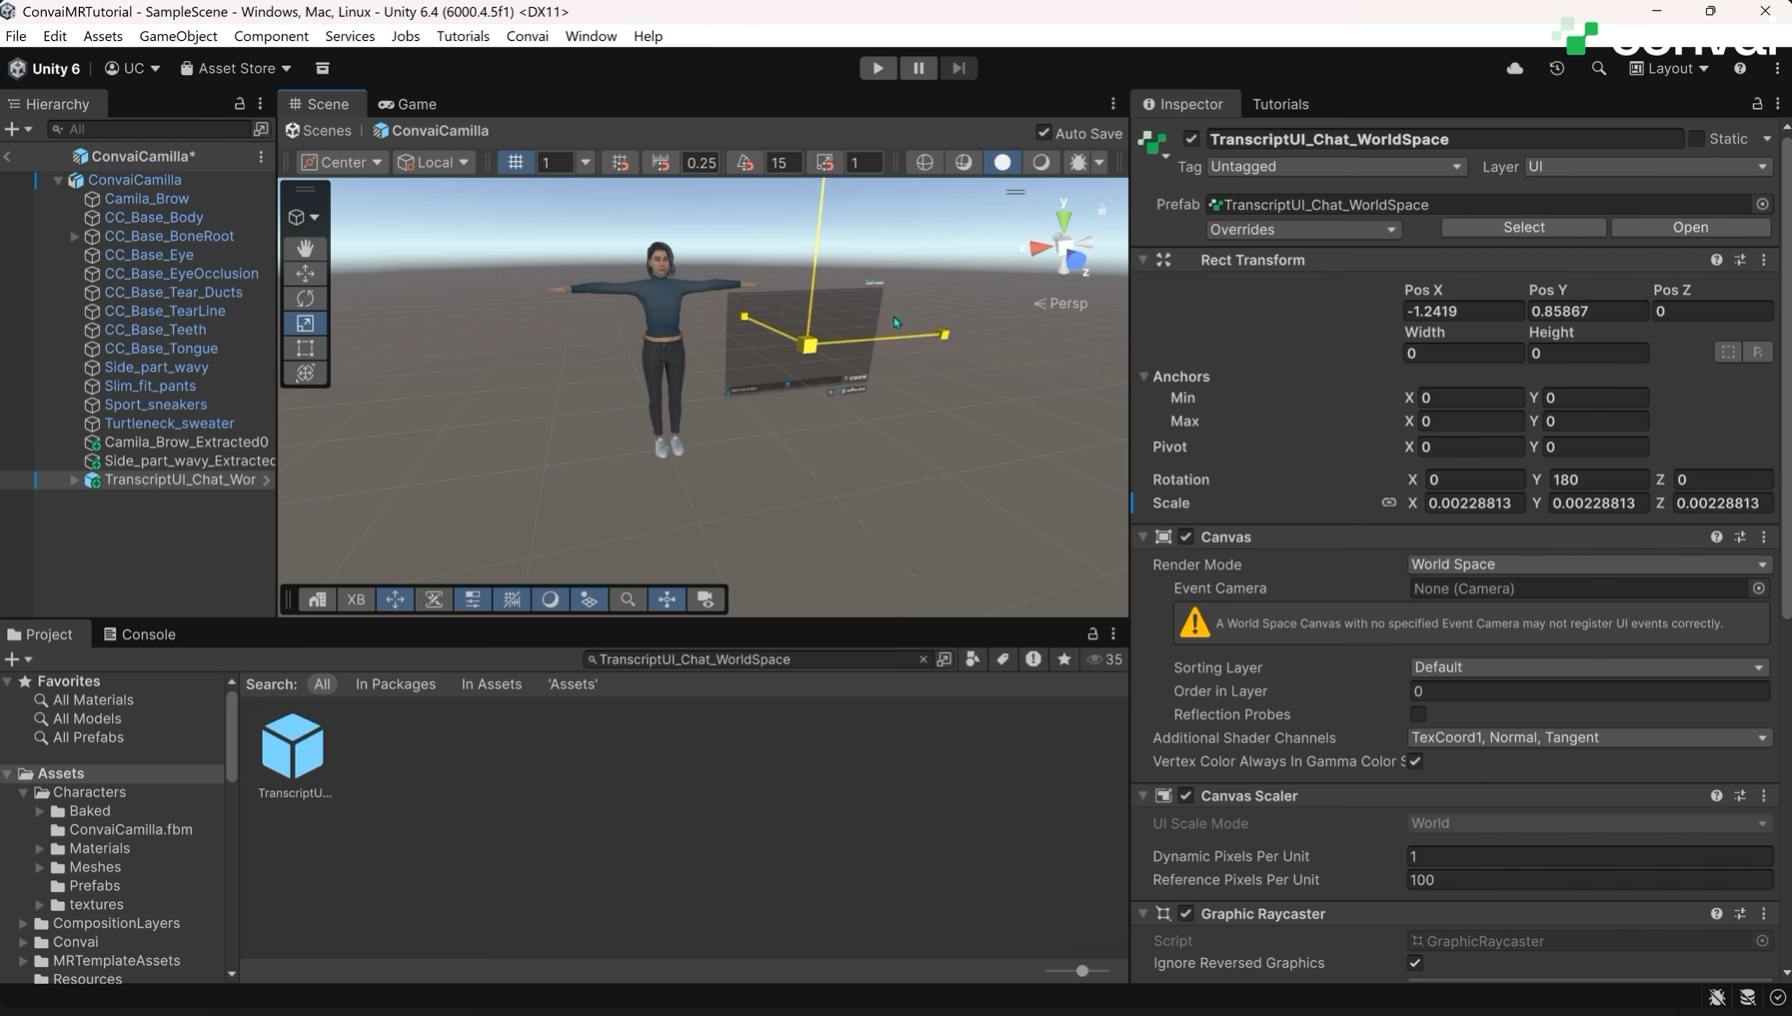
Because the character spawns at runtime, the transcript UI has to travel with it. Add the UI to the character prefab rather than the scene.
Double-click the character prefab to open it, click Assets, and search for Transcript UI Chat World Space. No results? Click the eye icon and choose All to widen the search scope. Drag the prefab into the character, then set its position and scale so the panel stays readable at conversational distance.
A world-space canvas matters more in mixed reality than it does on a monitor. Screen-space UI locks to the headset display and breaks the illusion that the character shares your room; a world-space panel anchored near the avatar stays where you left it.
Also read: How to Build Mixed Reality AI Characters in Unity with Convai on Meta Quest (2026)
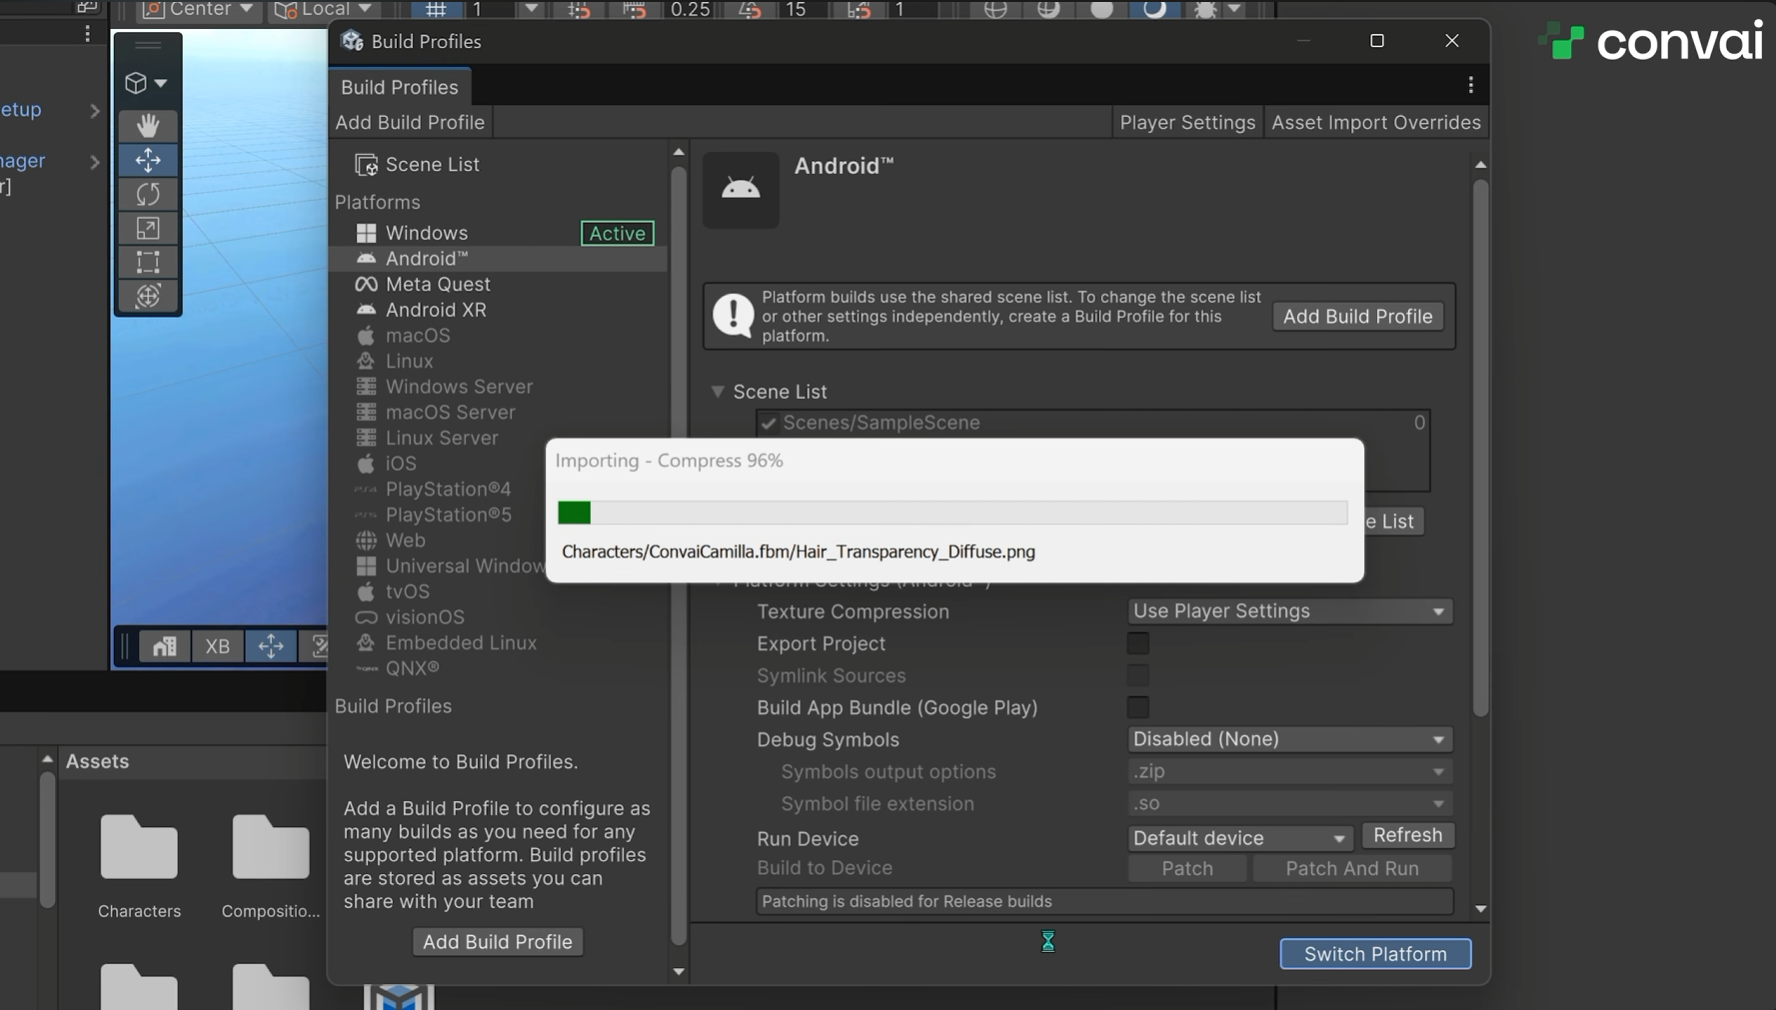
Open File > Build Profiles, choose Android, and click Switch Platform. Unity takes a few minutes to convert the project. If your setup uses a dedicated Meta Quest build profile, select that instead of plain Android.
Before building, confirm the correct scene is included. In this tutorial that's SampleScene. Then select your device, in this case a Quest 3, create a new folder for the output, name the file, and hit Save.
Put the headset on and the character appears where you place it. Asked "How does the room look from where you're standing?", the avatar answers:
"From here, I really like how the room feels both spacious and cozy at the same time. The way the light comes in and hits different surfaces is quite pleasant."
The video skips this because the tutorial project already has it, but a Quest build with no microphone permission will not hold a conversation, and the failure looks like a broken character rather than a missing permission.
Android-based XR headsets follow the Android platform guide. Declare the android.permission.RECORD_AUDIO permission in your Android manifest at Assets, Plugins, Android, AndroidManifest.xml. Create the file if it doesn't exist, since Unity merges it with the generated manifest at build time.
Two things to watch beyond the declaration. First, the SDK does not request microphone permission for you, so request it during app initialization and wait for the callback before starting a session. Starting the microphone without permission throws an InvalidOperationException. Second, after a build, open the exported APK or AAB and confirm the permission survived the manifest merge, which can drop entries from a malformed file.
The character in the demo talks about curtained windows and daylight because it receives the headset's passthrough camera feed. That comes from QuestVisionFrameSource, which streams passthrough frames from a Quest 3 or 3S to Convai so the AI avatar can see and respond to whatever the wearer is looking at. See the Meta Quest Vision setup guide for the full walkthrough.
The component binds to the Meta XR SDK's PassthroughCameraAccess through reflection at runtime, so the Convai SDK carries no hard compile-time dependency on any Meta package. You can update or swap Meta XR SDK versions without touching Convai.
Setup runs in five moves: import the Meta XR SDK and add a PassthroughCameraAccess component to a scene GameObject, add QuestVisionFrameSource, assign the PassthroughCameraAccess reference to its Passthrough Camera Access field, add ConvaiVisionPublisher to the same GameObject, then declare the manifest permissions.
Two permissions are mandatory here, both declared in the same Android manifest: horizonos.permission.HEADSET_CAMERA and android.permission.CAMERA. Without them the passthrough camera never starts, and the frame source drops into a Failed state after three retry attempts.
The Inspector defaults suit most projects. Source Id arrives as quest-passthrough, the identifier ConvaiVisionPublisher uses to pick this frame source, and Flip Y stays on so published frames come through top-down. Disable Flip Y only if your Meta XR SDK version already handles orientation before handing Unity the texture.
The three fields worth tuning are all bandwidth levers. Max Output Width (1280) and Max Output Height (720) set the pixel size of frames sent to Convai, and Target Frame Rate (15) caps the capture loop. On a constrained network, dropping the frame rate to 10 and the width to 960 cuts the per-frame payload without meaningful loss for object recognition, which is the configuration Convai's industrial safety training example uses.
One trap catches most people: QuestVisionFrameSource produces no frames in the Unity Editor and transitions to Failed with InvalidConfiguration, because PassthroughCameraAccess only runs on Horizon OS. Test Vision on a physical Quest 3 or 3S. Once the build is on-device, the Vision status in the Convai Settings Panel should read Ready.
On non-Meta XR headsets, including OpenXR-only devices, Windows Mixed Reality, and HoloLens, no built-in frame source exists. Implement IVisionFrameSource and feed frames from your own XR SDK's camera API, then assign it to ConvaiVisionPublisher.
Also watch: How to Add AI Characters to Unity 6 VR Projects (Meta Quest & PCVR)
How do I add a Convai AI character to a mixed reality project in Unity 6? Create a Unity 6 project with the Mixed Reality Template, open SampleScene, add the Convai Player component to XR Origin under MR Interaction Setup, set the Object Spawner's Object Prefabs size to 0 and drag in your Convai character prefab, attach a world-space transcript UI to the character prefab, then build for Android or your Meta Quest build profile.
Which Unity template should I use for a Convai mixed reality project? Unity 6's Mixed Reality template. It ships a pre-configured XR Origin and Object Spawner, which is the setup this workflow builds on.
Why do I add the Convai Player component to XR Origin? It lets Convai reference the headset wearer as the player, so the character knows who it's speaking with and where that person is. In a custom project, add the component to your own player GameObject instead.
Does the Convai Unity SDK work on Meta Quest without extra configuration? Voice conversation, lip sync, actions, emotion, long-term memory, narrative design, and spatial audio all run on Android-based XR headsets with no XR-specific setup. You still declare RECORD_AUDIO in your Android manifest, and Vision needs its own configuration.
How does the AI character see my real room on Quest? Through QuestVisionFrameSource, which streams the passthrough camera feed from a Quest 3 or 3S to Convai. It requires the Meta XR SDK, a PassthroughCameraAccess component, a ConvaiVisionPublisher, and both horizonos.permission.HEADSET_CAMERA and android.permission.CAMERA in your manifest.
Why does passthrough Vision fail in the Unity Editor? PassthroughCameraAccess only runs on Horizon OS, so QuestVisionFrameSource produces no frames in the Editor and enters the Failed state with InvalidConfiguration. Test on a physical Quest 3 or 3S.
Can I place the Convai character in the scene instead of spawning it at runtime? Yes. Runtime spawning through the Object Spawner is one option. You can also place the character in the scene yourself, use your own spawning system, or instantiate the prefab from a custom script.
A Convai mixed reality build gives your AI avatar a real position in a real room, with real-time voice, lip sync, and the full Convai feature set on the headset. Set up the Mixed Reality Template, wire XR Origin and the Object Spawner, attach a world-space transcript UI, declare your permissions, and build for Quest.
Ready to build? Sign up at convai.com · Read the XR headsets guide · Get the plugin on the Asset Store · Ask questions on the Developer Forum
Follow Convai: LinkedIn · Reddit · X/Twitter · Instagram · YouTube


