Use Cases

Getting an AI character into a flat Unity scene is one thing. Getting one that can see your actual room, respond to what is physically around the user, and hold a real conversation in Mixed Reality is something else entirely.
This guide walks through exactly how to set that up using Convai's Unity SDK, the Meta MR Utility Kit, and a Meta Quest device. By the end you will have a Convai-powered AI character running in a passthrough MR app that can see and describe the real world through the Quest camera.
Watch the full tutorial below:
Start with a Unity URP project that has already been converted to Android build target. You need three packages:
If you have not imported the Convai SDK before, check out the full Convai Unity setup tutorial. The process takes a few minutes and the Convai documentation covers every step.
Also read: How to Build AI Character-Led VR Projects in Unity with Convai
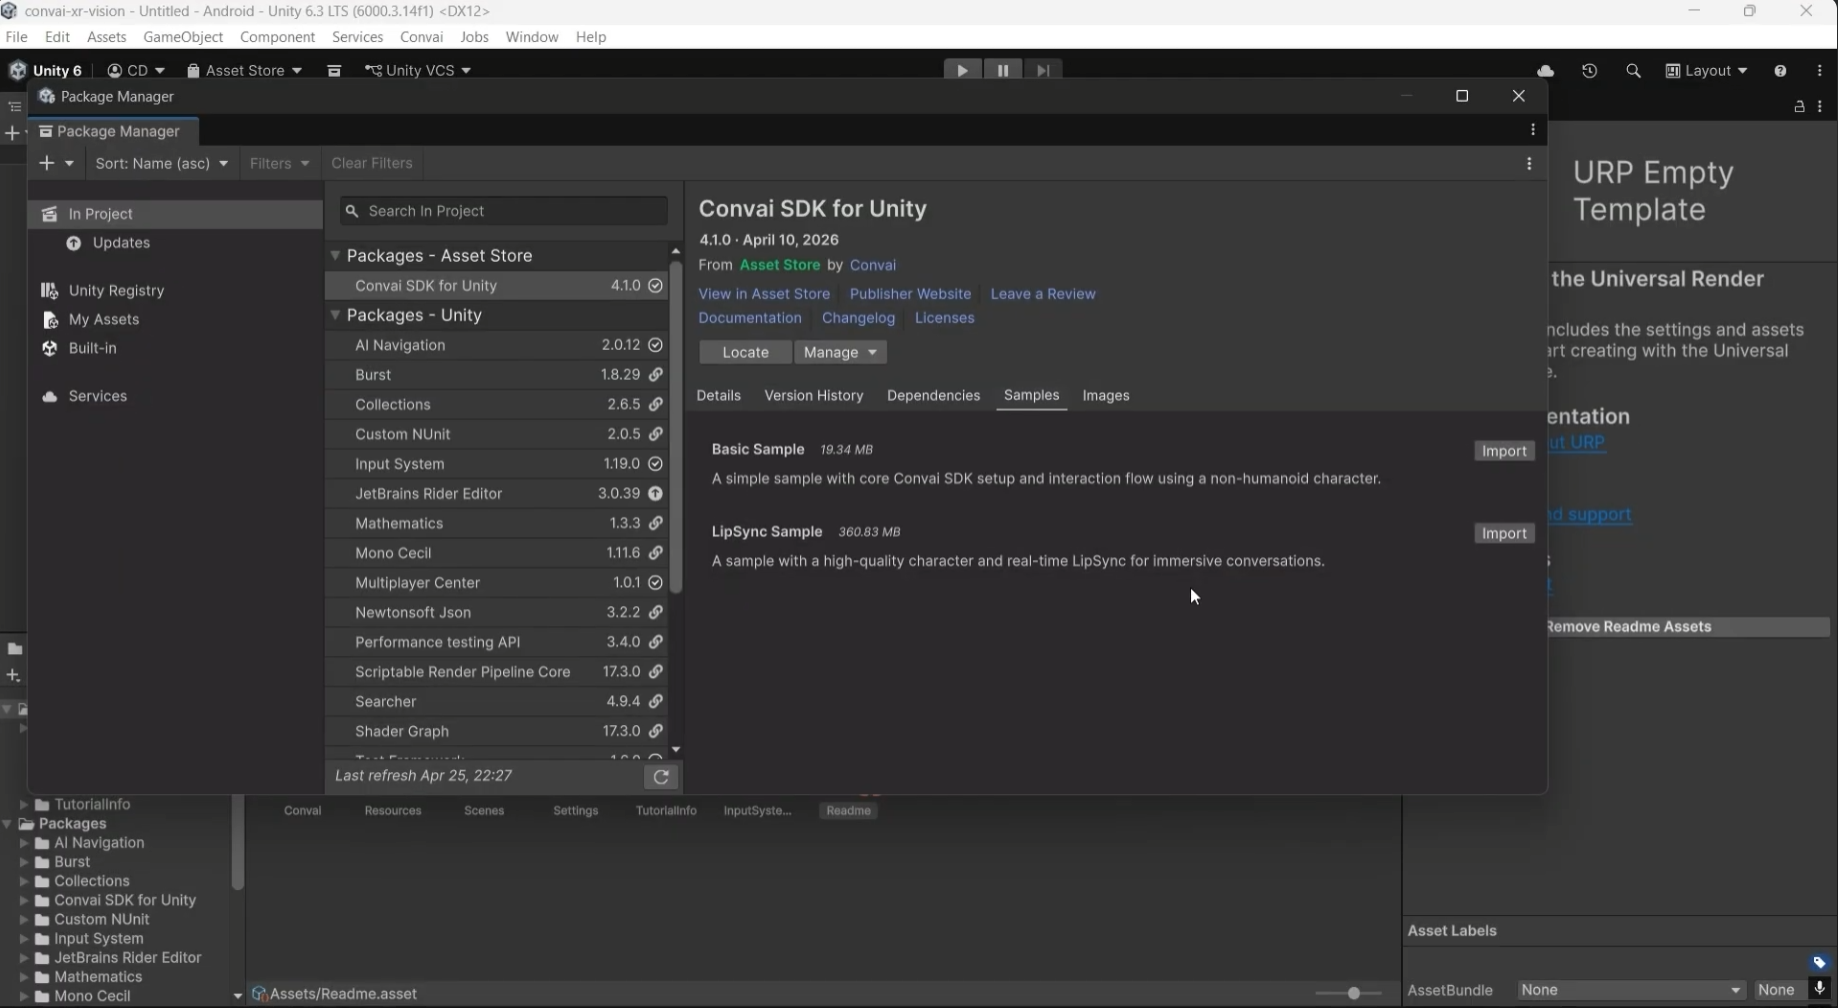
Open Unity and go to Window > Package Manager. Click the plus icon and select Install Package from Git URL. Paste in the Convai package name from the documentation.
Once imported, navigate to the project files and launch the lip sync sample scene. When prompted, import TMP Essentials.
Find the Convai character in the scene hierarchy. You will see the Character ID field already pre-populated with a sample character. You can replace this with any character ID from the Convai Playground.
Under the Convai Manager, find Advanced Room Defaults and make sure Enable Accused is checked. Run the scene and test a quick conversation to confirm the SDK is connected and responding before moving on to the MR setup.
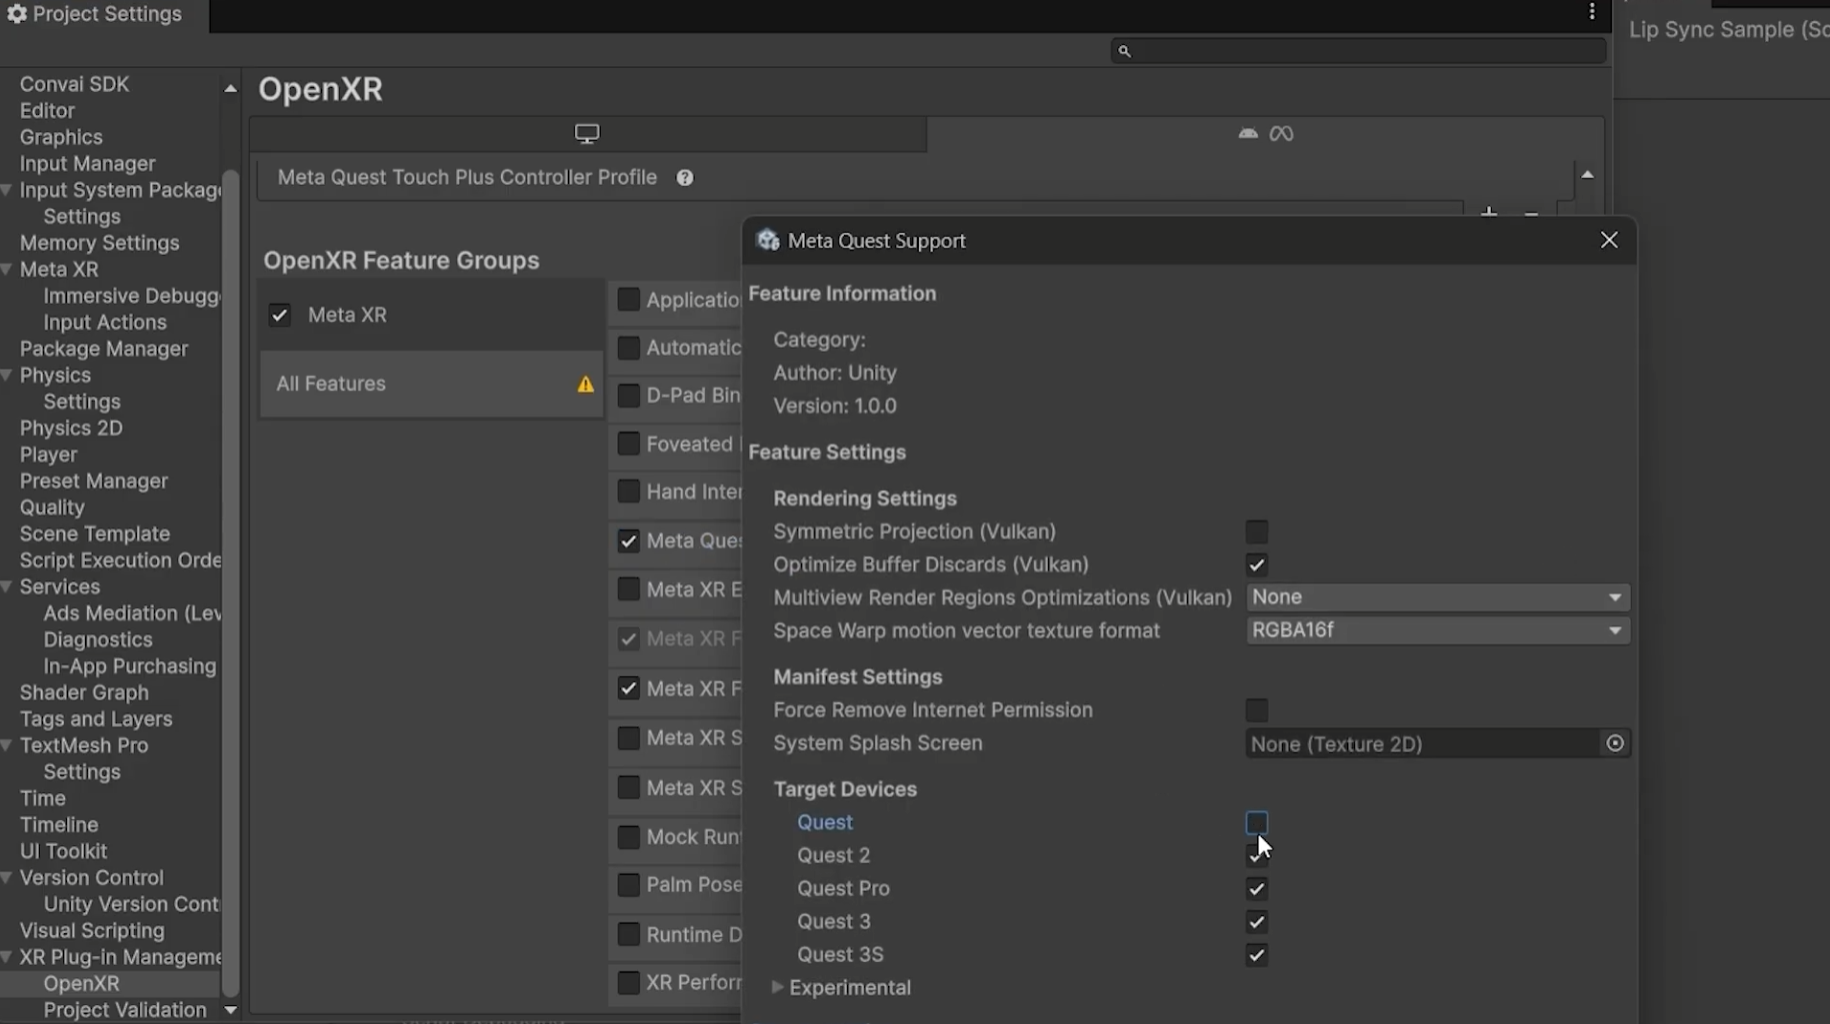
With the Convai SDK confirmed working, install the Meta MR Utility Kit. Go to Window > Package Manager, click the plus icon, select Install Package from Git URL, and paste in the MR Utility Kit package name. This also installs the XR Core SDK automatically as a dependency.
Install the OVR Interaction package the same way.
Once both are installed you may see a few warnings. These are safe to ignore.
Now convert the project for XR:
Read the full updated documentation for Unity MR setup with Convai to learn more.
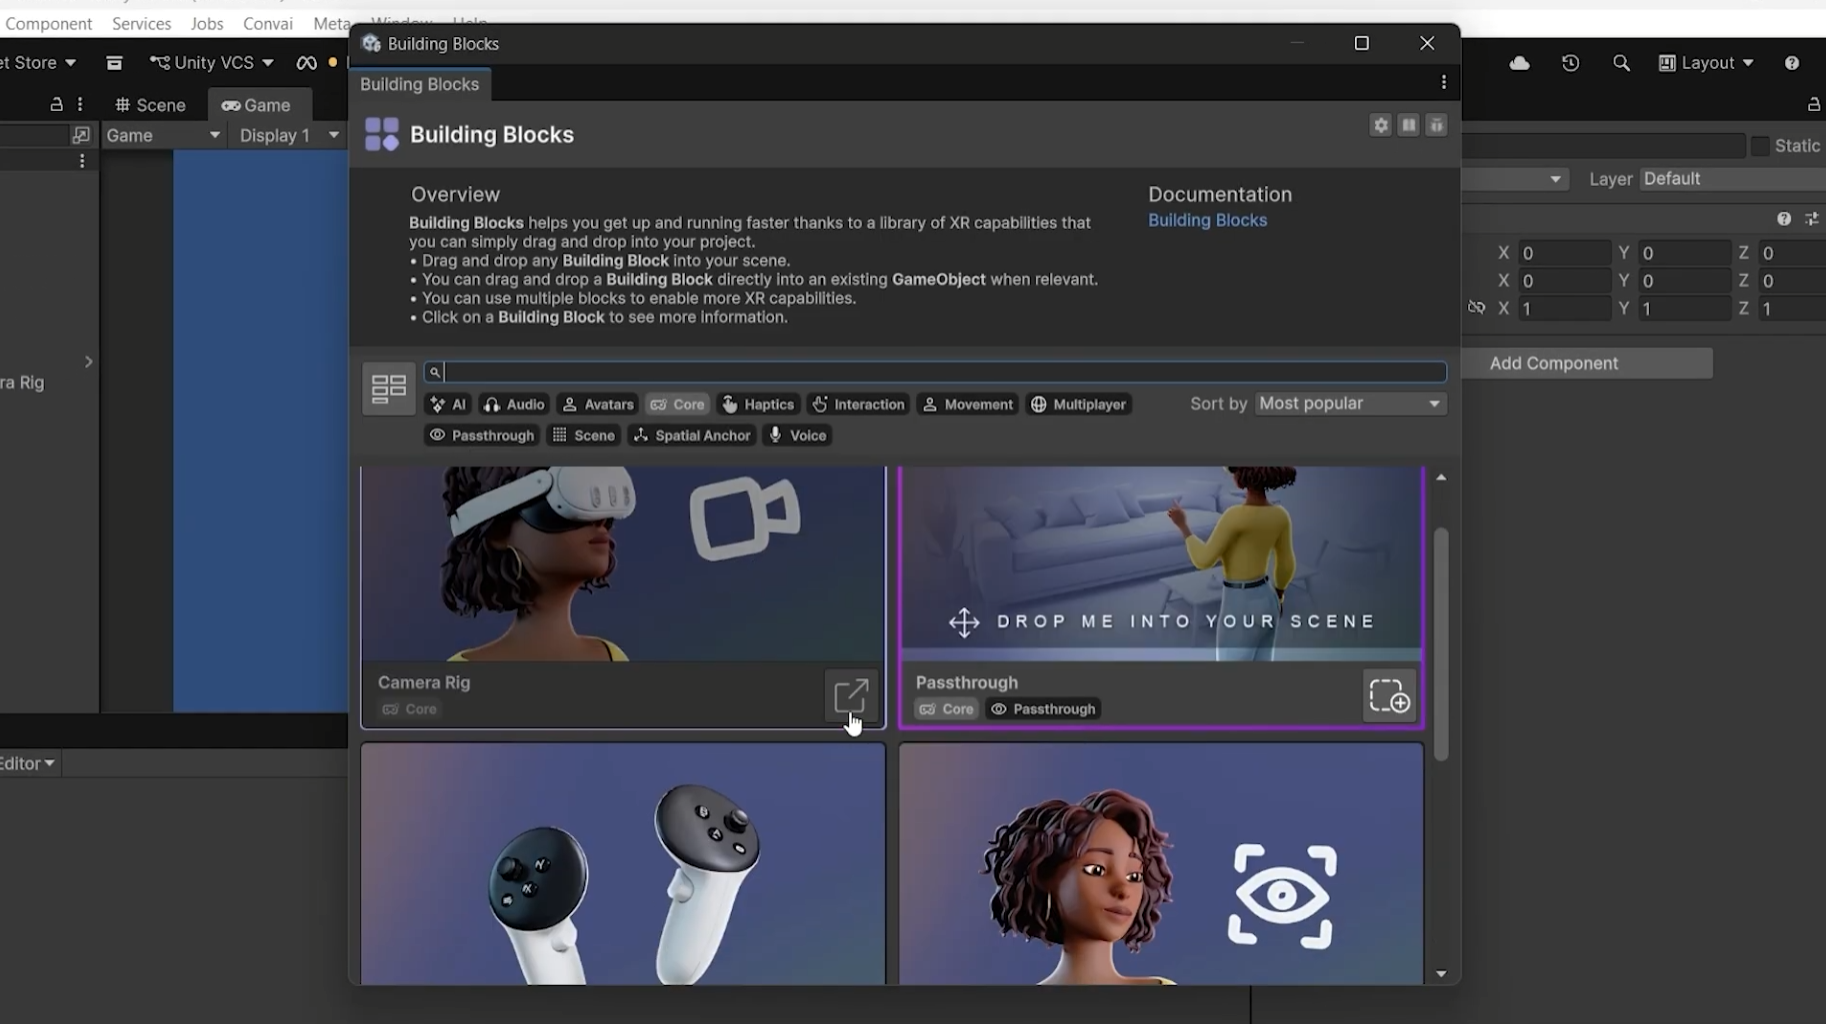
The standard Convai scene uses a Unity camera and environment setup that conflicts with passthrough. You need to disable those and replace them with Meta's camera rig.
In the hierarchy, go to Convai > Camera and uncheck the camera component in the Inspector. Do the same for the Environment object.
Now go to Meta Quest Tools > Building Blocks. Under the Core filter, add the Camera Rig and Passthrough building blocks. Under the Passthrough filter, also add Passthrough Camera Access, since the vision feed needs to be sent to the Convai server. Hit Overwrite when prompted.
If your Convai character is not visible after this, select it in the hierarchy and update the transform position values until it appears in the scene view.
Also read: Build Vision-Based Conversational AI Characters in Unity
This is the part that makes a Mixed Reality AI character fundamentally different from a flat-screen one. When vision is enabled, the Convai character receives a live feed of whatever the Quest camera sees and can describe, reason about, and respond to the actual physical environment around the user.
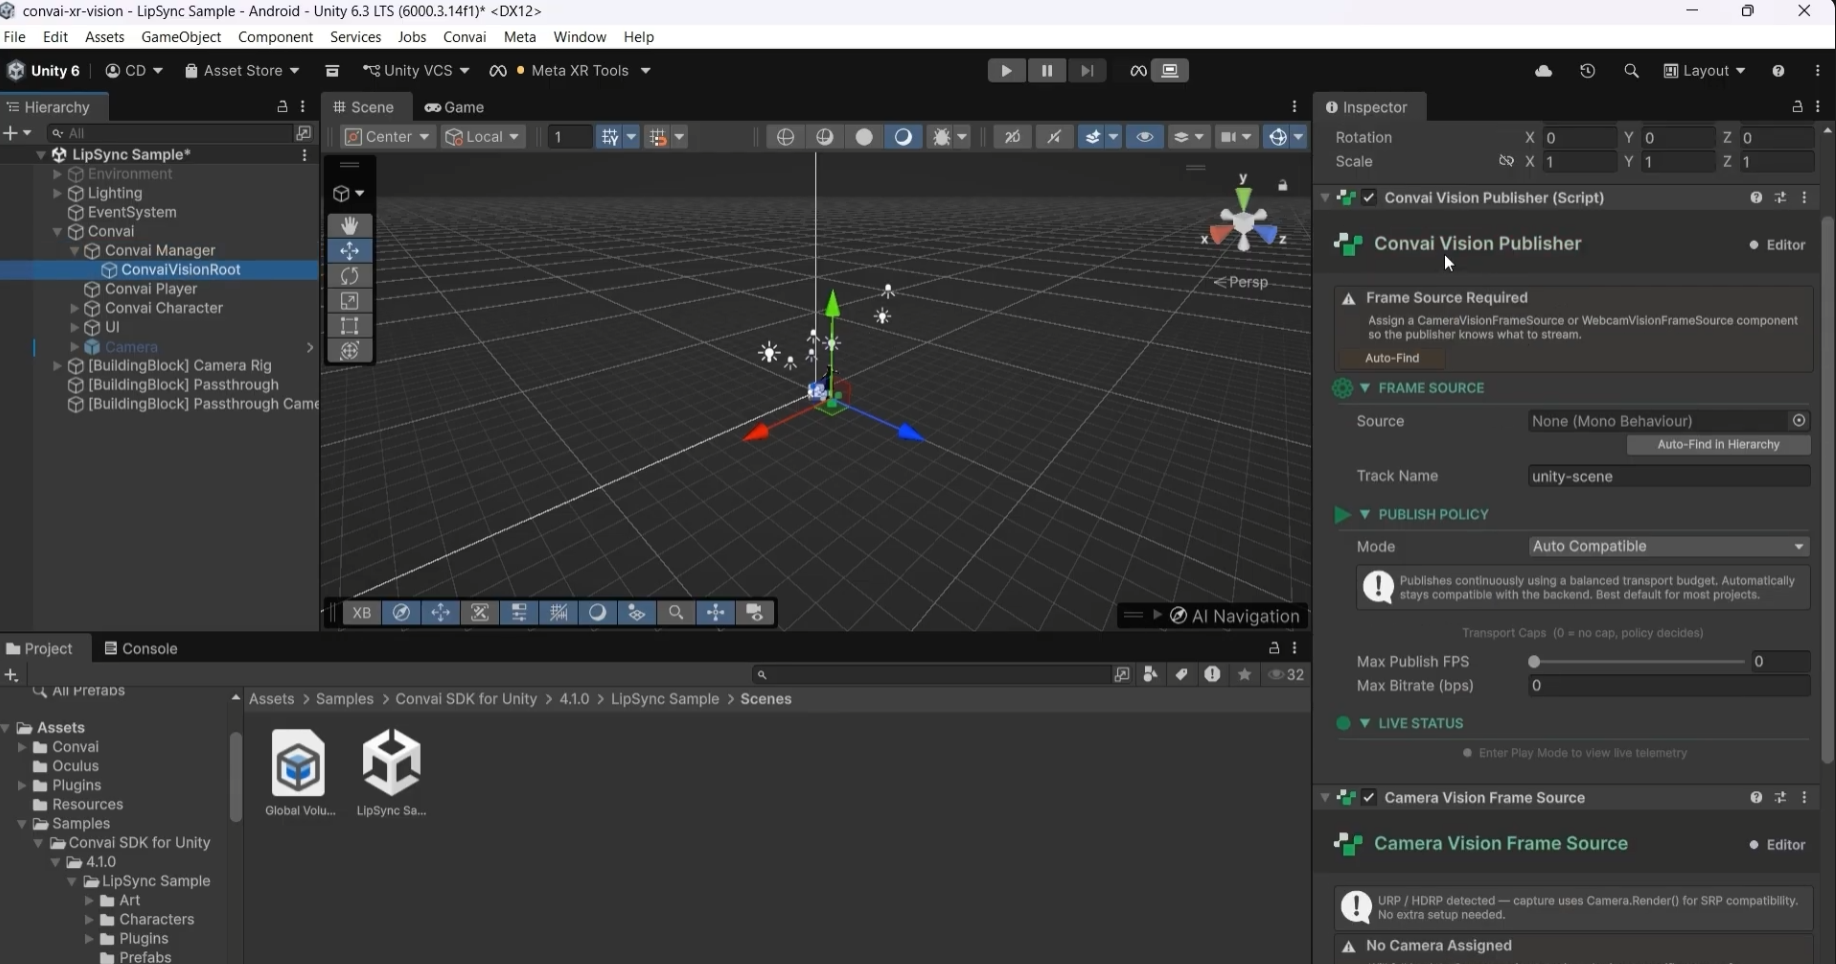
Select the Convai Manager in the hierarchy. Change the Connection Type to Video. You will be prompted to add the Convai Vision Publisher and Camera Frame Source components. Click Add Components.
These components appear as children of the Convai Manager in the hierarchy. By default they use a Unity camera as the frame source. Replace this with the Quest Vision Frame Source by dragging the Passthrough Camera Access object into the frame source field.
Click Auto Find inside the Convai Vision Publisher. Then go into the Camera Rig, find the Passthrough and Camera Access options, and make sure both are enabled.
Also read: Real-Time AI Conversations and Facial Animation for MetaHumans in Unreal Engine with Convai
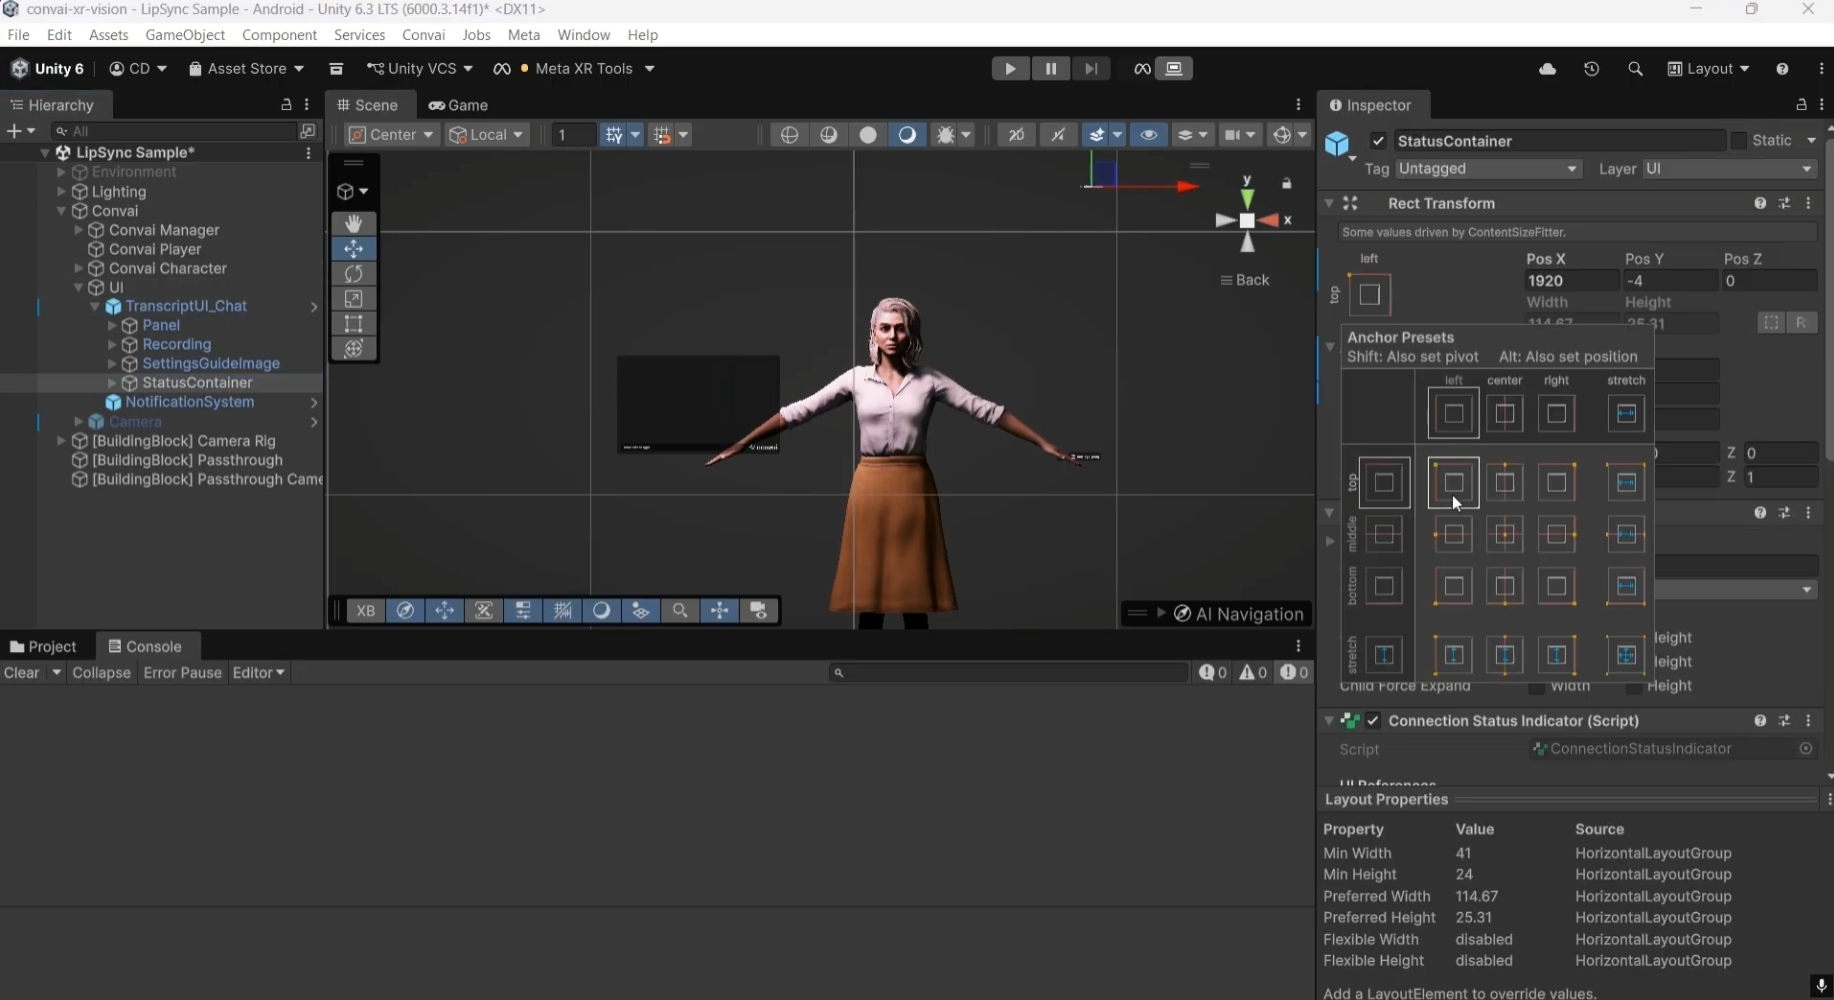
The default Convai canvas UI is designed for flat screens. In a MR scene you need to convert it to world space and scale it down so it sits naturally next to the character.
Select the canvas in the hierarchy and change the Render Mode to World Space. Set the position values to zero so it appears in front of the player. The UI will likely appear huge at this point.
Change the canvas Scale from 1 to 0.001. This brings it down to a readable size within the headset. Update the alpha value to 1 if the UI is invisible.
Fix the Status Container, Recording prefab, and Settings prefab positions to the left of the character. Add a slight tilt to match the natural viewing angle inside the headset. Tweak position values until everything looks right in the scene view.

Go to File > Build Profiles. Click Open Scene List and add the lip sync scene. Select your destination folder and hit Build.
Connect your Meta Quest device via USB. The built app will appear in Unknown Sources on the headset. Launch it from there.
You can also add a directional light to the scene before building to improve how the character looks in varied real-world lighting conditions.
A Convai AI character with MR passthrough and vision is not just a novelty demo. It opens up real use cases:
Furthermore, Dynamic context, that powers game state tracking in virtual environments works amazing here. Spatial observations from the camera feed become context variables the character carries across the conversation. What the character sees on turn one informs how it responds on turn five.
According to a 2023 report by VR Intelligence, 62% of XR developers believe AI will significantly enhance user engagement in immersive environments. Vision-enabled AI characters that can perceive and respond to the real world are a significant part of why.
Also read: Conversational AI Avatars in XR for L&D: Scalable Training from Soft Skills to Hard Skills
Try asking your character to describe what it sees around you. Point at objects in your real environment and ask follow-up questions. Then open Mindview in the Convai Playground to inspect exactly what visual context and conversation history reached the LLM on each turn.
The Convai Unity Plugin documentation covers the full SDK setup including the vision components. For MR-specific questions, the Convai Developer Forum is the fastest place to get support.
The XR Animation Capture App also lets you record custom gestures and animations directly on Meta Quest without a mocap suit, which you can bring into this same setup to give the character natural physical behaviors.
Also read: Agentic AI Platform for Virtual Worlds: How Convai's Always-On Reasoning Works
Import the Convai Unity SDK via Package Manager, add the Meta MR Utility Kit and OVR Interaction packages, convert the scene for XR using OpenXR, then add a Camera Rig and Passthrough building block from Meta Quest Tools. The Convai character component works with the existing lip sync sample scene.
Set the Convai Manager connection type to Video, add the Convai Vision Publisher and Quest Vision Frame Source components, then link the Passthrough Camera Access to the Vision Publisher. The character receives a live feed of the camera and can describe what it sees in real time.
You need three packages: the Convai Unity SDK, the Meta MR Utility Kit, and the OVR Interaction package. The MR Utility Kit also installs the XR Core SDK as a dependency automatically.
The Convai Vision Publisher sends a camera feed to the Convai server for processing. The Quest Vision Frame Source is the Meta Quest-specific input that replaces the default Unity camera, feeding the actual passthrough camera into the publisher.
Yes. When vision is enabled via the Quest Vision Frame Source and Passthrough Camera Access, the Convai character receives a live feed of what the Meta Quest camera sees and can describe the real environment including objects, layout, and spatial detail in real time.


