Use Cases
.png)
Phase 1 of the Convai Actions series covered the four default navigation behaviors: Move To, Follow, Stop Moving, and Wait For. Those work out of the box with zero Blueprint scripting.
Phase 2 is where things get interesting. Custom Actions let you wire any behavior you want to a named action the LLM can trigger conversationally. The player says something. The LLM maps the intent to your action. Your Blueprint executes it. The character does it, not just talks about it.
This tutorial covers the full Phase 2 workflow: adding a simple Print action to understand the structure, adding a String parameter to make it dynamic, triggering animations through montages, and using parameter choices to select between multiple animation variants with a single action definition.
Watch the full tutorial below:
Also read: Phase 1 Blog: How to Make AI NPCs Act on Your Commands in Unreal Engine 5 with Convai
The Phase 2 action structure has three parts: declare the action, implement the Blueprint handler, and call Handle Action Completion when the action finishes. This tutorial starts with a Print action to make the structure clear before adding anything complex.
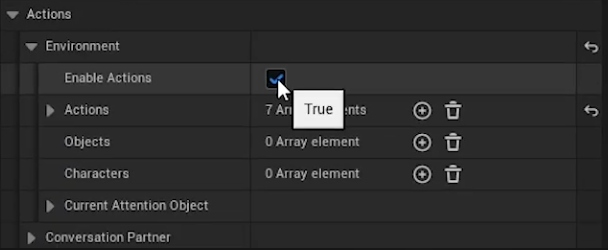
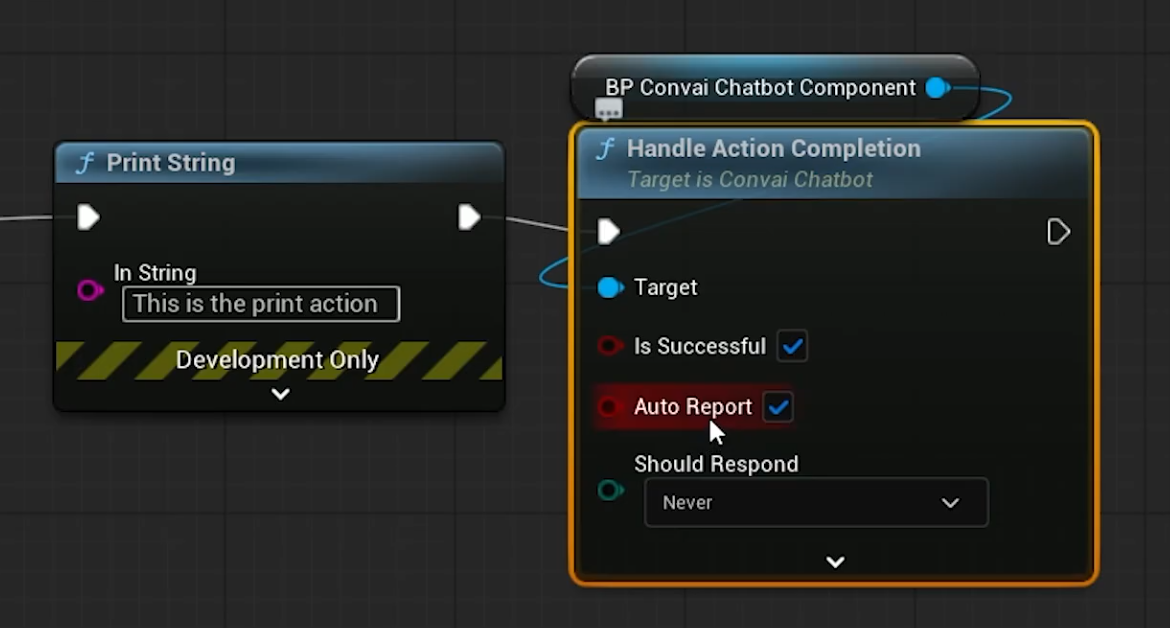
With this in place, ask the character: "Hey, can you print?" The character responds verbally and simultaneously executes the Blueprint logic. In the demo, the print string appears on screen while the character says it has been triggered.
Also read: How to Use Dynamic Context in Convai to Build AI Characters That React in Real Time
Handle Action Completion is how your Blueprint tells the Convai system that an action has finished. Every action handler must call it, on every execution path.
If you do not call it, the AI gets stuck. It continues waiting for the current action to finish before it will process anything else. No new actions, no dialogue, nothing. The character goes silent until Handle Action Completion is called or the session resets.
The function takes two inputs:
Auto Report is a separate toggle. When enabled it sends a context message back to the LLM letting it know the outcome. For simple actions like Print you can leave it off. For failure cases it is worth enabling so the character can respond naturally to the failure.
Use Mindview to verify that action completion signals are reaching the LLM correctly on each turn. If the character goes silent after an action, Mindview shows whether the completion event was registered.
A hardcoded Print action prints the same string every time. A parameterized Print action prints whatever the player asked for. Parameters are what make actions feel like the character is actually listening to the request rather than following a preset script.
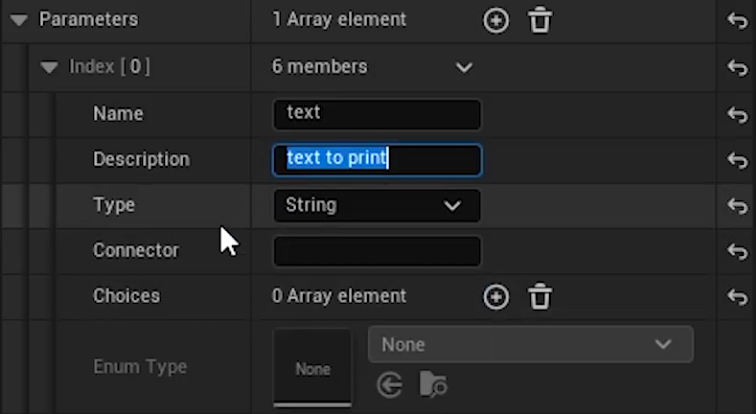
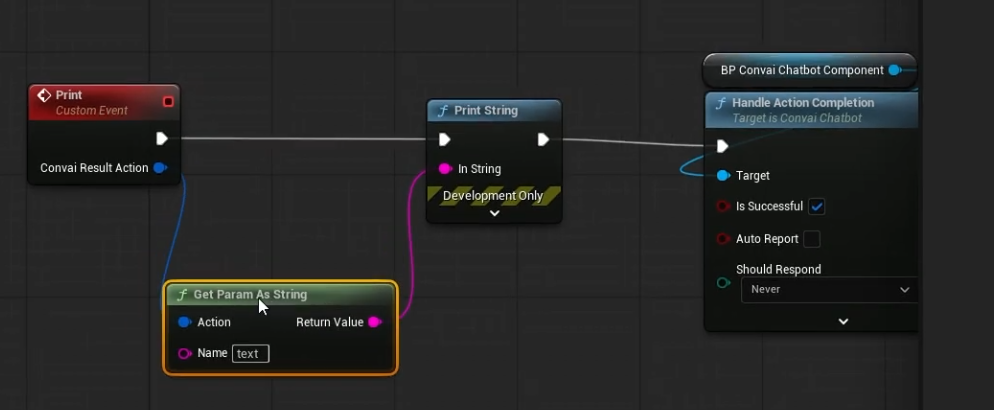
Now when the player says "Print your name on the screen" the LLM reads the player's intent, fills the text parameter with the character's name, and the Blueprint prints it. The character is no longer printing a hardcoded string. It is printing what the player asked for.
In the demo, the character is asked to print its name, then responds and prints it on screen. When asked again more openly, the character reflects on what to print and chooses something itself, then prints it. The parameter gives the LLM genuine creative latitude within a defined action structure.
Printing text is a clean example for learning the structure. The real power shows when actions trigger animations. This is where Prompt-to-Action becomes visible to the player: the character does not describe the action. It performs it.
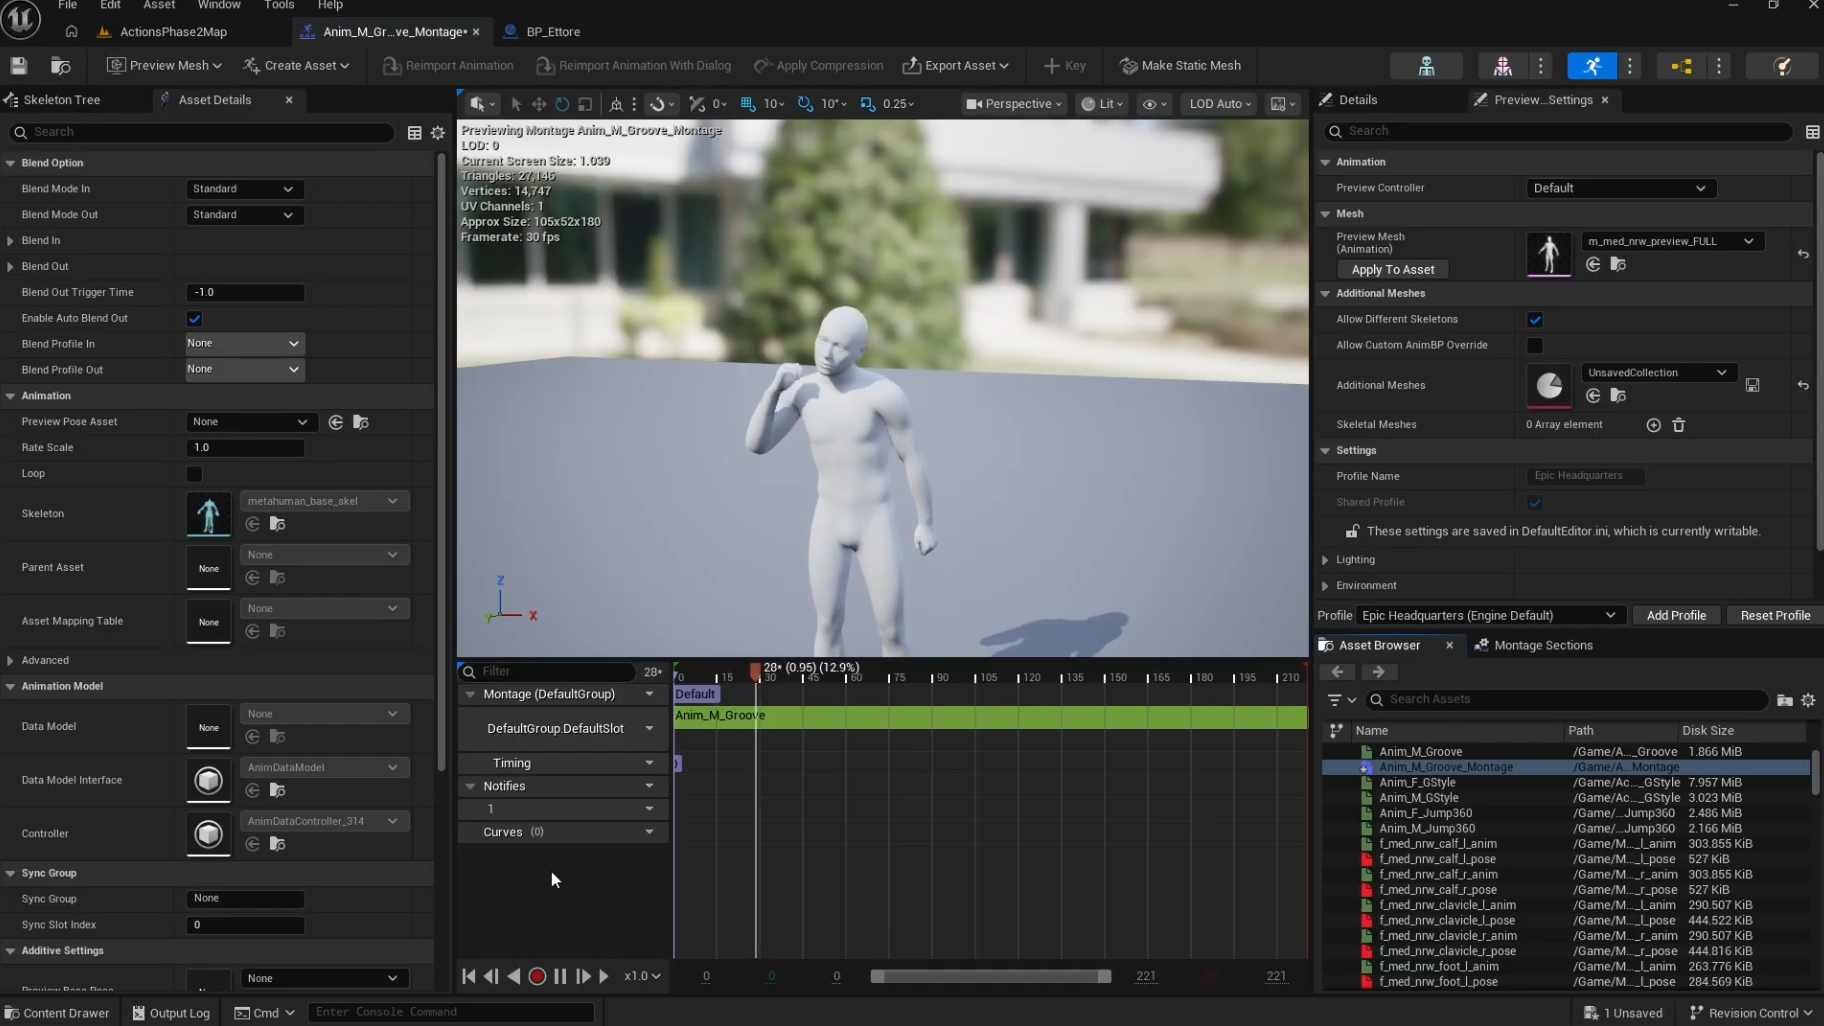
Convai Actions trigger animations through Animation Montages, not raw animation assets. This is required because montages give you control over blend transitions and interruption handling.
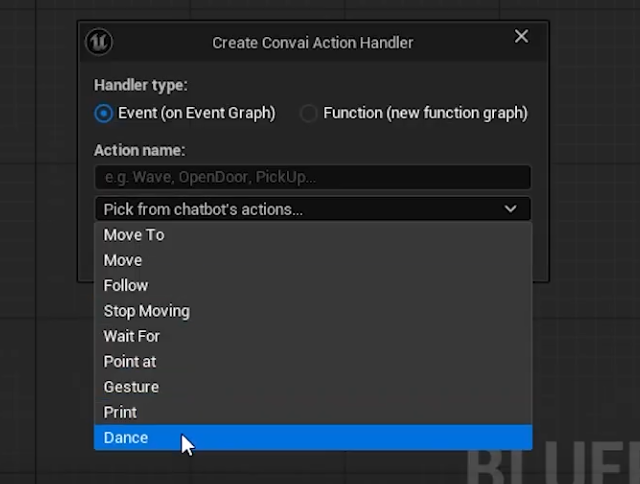
Ask the character: "Can you show me one of your dance moves?" The character responds verbally and immediately starts the animation. In the demo, the voice was also updated between Phase 1 and Phase 2 because the previous voice felt too slow for a character with this level of energy.
Also watch: Convai Actions Phase 1: Default Navigation Actions
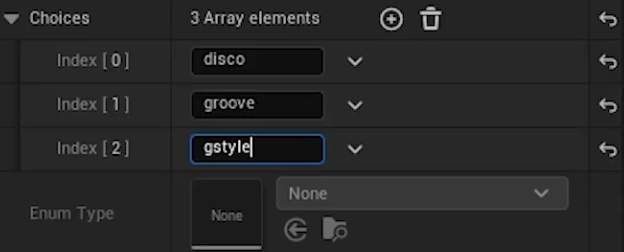
Suppose you have three dance animations: a groove, a disco, and a G-style. Creating a separate action for each means duplicating the action name, description, and Blueprint handler logic three times. That does not scale.
The correct approach is one Dance action with a parameter that selects between the three. Parameter choices constrain the LLM to only select from the options you define, which means the Blueprint handler always receives a known value.
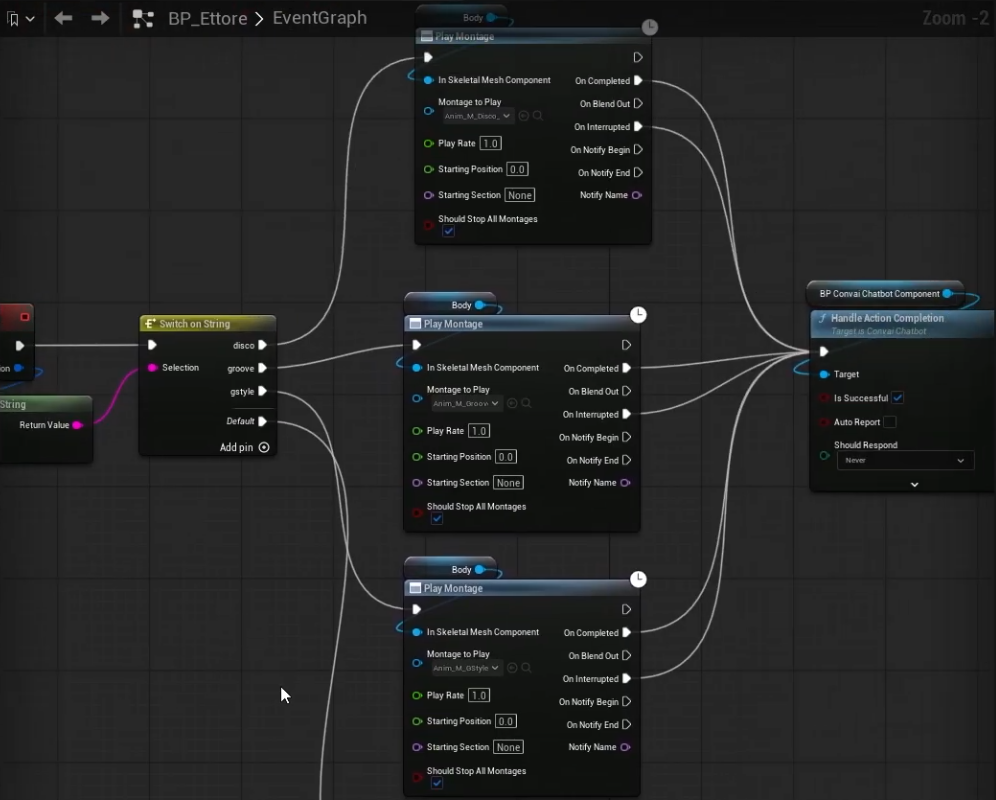
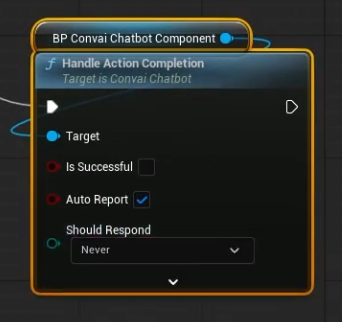
The default case handles requests the character cannot fulfill. Wire it up like this:
In the demo, the player asks for a ballet dance. The character cannot do ballet. The fallback fires, auto-report notifies the AI, and the character responds: "Ballet is not really my thing. I'll leave that to people with actual grace." The action system handled an unsupported request cleanly without breaking the experience.
Everything in Phase 2 depends on the same Dynamic Context pipeline that powers Phase 1. When a player speaks a command, Dynamic Context assembles the current scene state, the available action templates, and for parameterized actions, the list of valid choices. All of this reaches the LLM at once.
The LLM does three things simultaneously: generates the verbal response, selects the action to execute, and fills in the parameter values. The player hears the character speak and sees it move at the same time. That is what makes Prompt-to-Action feel natural rather than sequential.
For a single Dance action with three choices, the LLM reads the player's request, maps the intent to the Dance action, checks the choices list, selects the matching variant, and returns the parameter value to the Blueprint handler. The Blueprint plays the right montage. The whole thing happens in the time it takes the character to start speaking.
If the action selection feels wrong or the character picks the wrong animation variant, check Mindview to see exactly what action templates, parameter choices, and scene context reached the LLM on that turn. Wrong selections almost always trace to a description that is too vague or a choices list that does not match what the player actually said.
Phase 3 takes this further with typed parameters: actor references that resolve to scene objects, Number parameters for durations and quantities, Bool parameters for on/off states, and constrained Enum parameters that map directly to UENUM types in your project.
See the full Phase 3 Parameterized Actions documentation and the complete Convai Actions reference for the full system overview.
Sign up at convai.com to create AI characters and deploy them across games, simulations, virtual worlds, and training applications. For questions and support, the Convai Developer Forum is the fastest place to get help.
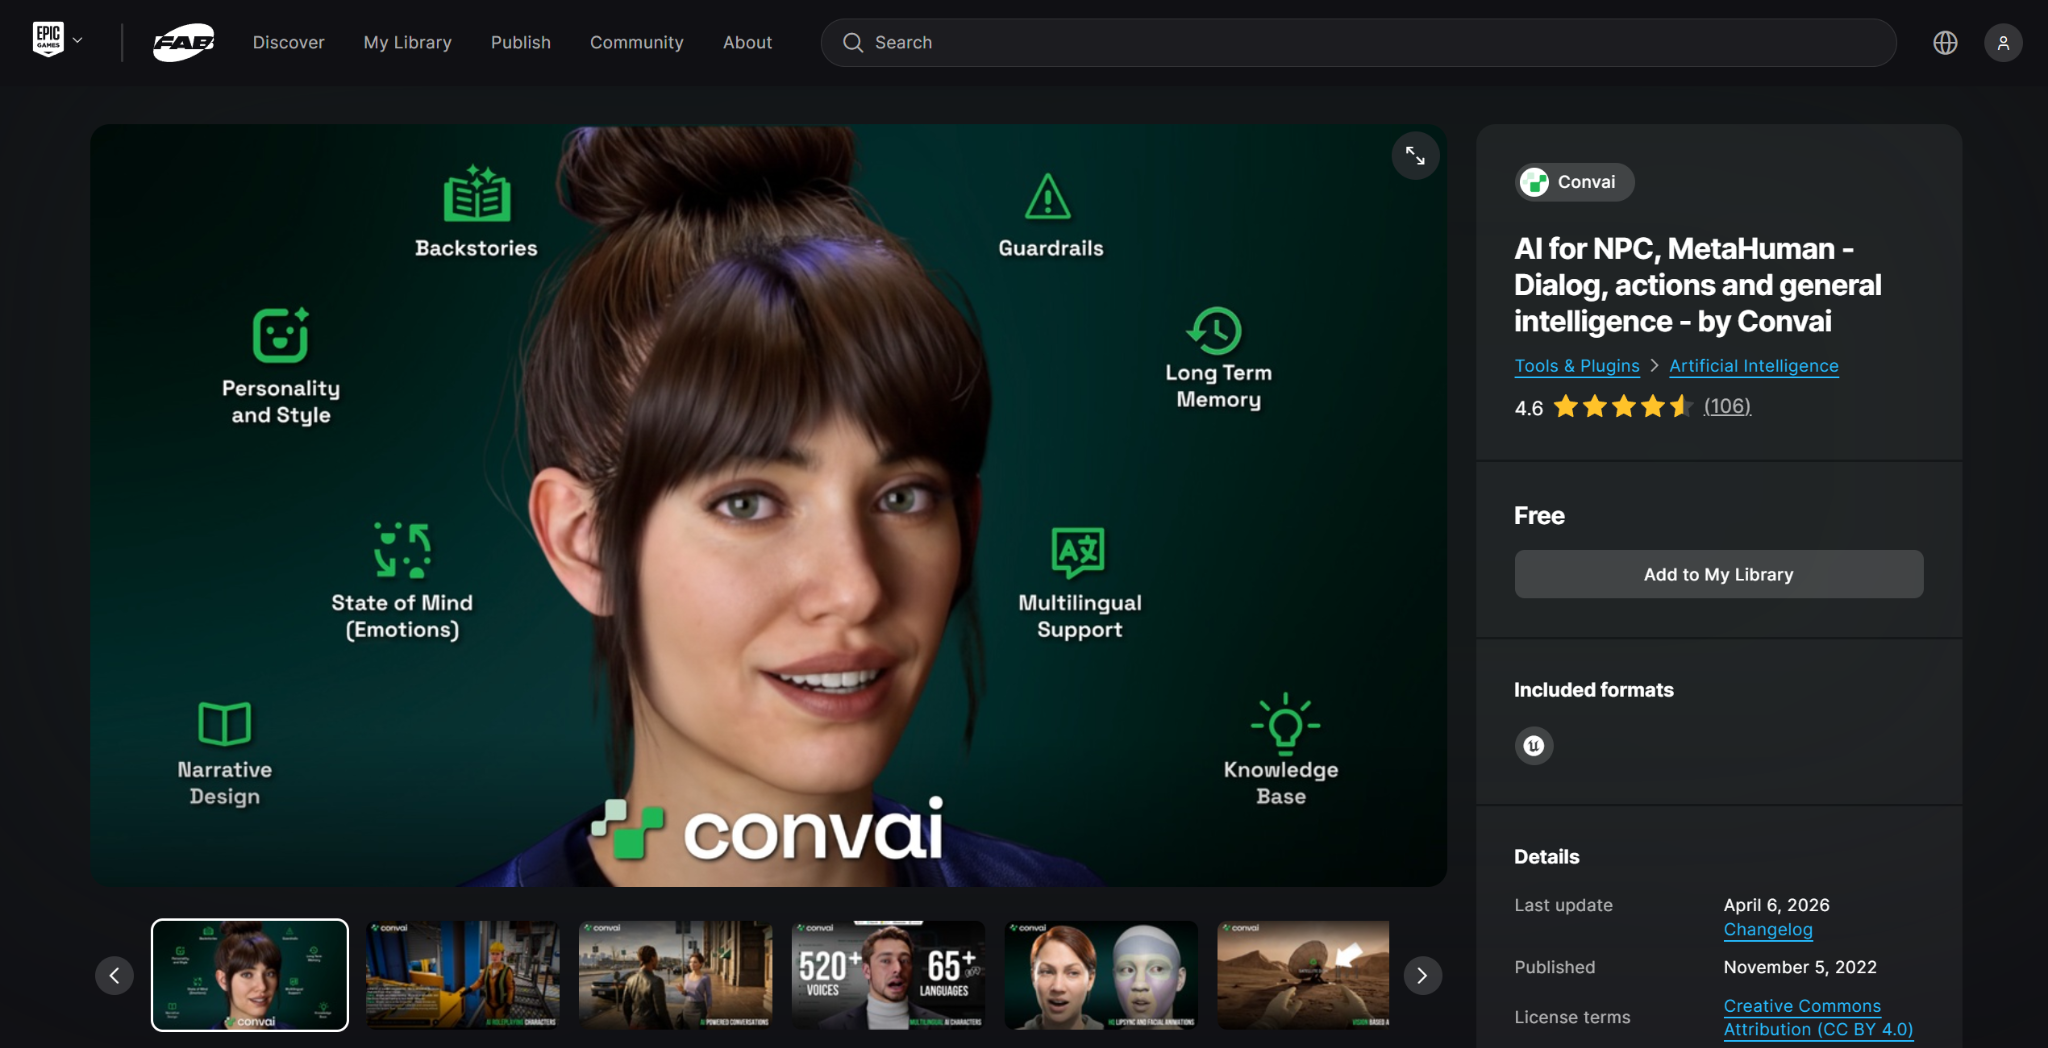
Select your character, open the Convai Chatbot Component in the Details panel, check Enable Actions, click + to add a new action with a name and description, compile, then right-click in the Blueprint Event Graph and search for Create Convai Action Handler. Select your action, click Create, implement your logic, and call Handle Action Completion at the end.
Handle Action Completion tells the Convai system that an action has finished. You must call it on every execution path including On Interrupted. Without it the AI stalls and will not execute further actions or dialogue. Set Is Successful to true or false and optionally enable Auto Report to send the outcome back to the LLM as context.
In the action settings under the Convai Chatbot Component, click + next to Parameters. Name it and set the Type (String, Number, Bool, Reference, or Enum). In your Blueprint handler, use Get Param As String (or the matching type accessor) and pass the parameter name to retrieve the value the LLM selected.
In the parameter settings, click + next to Choices and add one entry per valid option. The LLM will only select from this list. Requests outside the list fall to the default case in your Blueprint Switch on String node. Wire the default case to Handle Action Completion with failure and enable Auto Report so the character can respond naturally to the unsupported request.
Import your animation, right-click it, select Create > Create Anim Montage. Adjust blend in and blend out to one second each. In your Blueprint action handler, drag the character body skeleton, call Play Montage with your montage, and connect Handle Action Completion to both On Completed and On Interrupted. See the Phase 2 Custom Actions documentation for the full setup.
When a player speaks, Dynamic Context assembles the scene state, available action templates, and parameter choices, then passes everything to the LLM. The LLM maps the intent to the action, selects the parameter value from the choices list, and returns it to the Blueprint handler, which executes the matching logic.
Phase 1 Default Actions cover built-in navigation: Move To, Follow, Stop Moving, Wait For. Zero Blueprint scripting required. Phase 2 Custom Actions let you define any named action and wire it to Blueprint logic. Phase 3 Parameterized Actions add typed parameters for actor references, numbers, strings, and constrained enum choices.


