Use Cases

.jpg)
"It's quite dark in here. Could you turn on the lights?" "There. The workshop lights are on." The AI character understood the request, picked the right action, found the right object, and changed the scene. Nobody wrote a dialogue branch for it.
Convai Actions let a Unity character carry out what a player asks for. This tutorial covers the whole workflow: adding the Actions component, configuring the Action Runner, adding built-in actions, turning Unity GameObjects into action targets, and testing it all through voice.
▶ Watch the full walkthrough below:
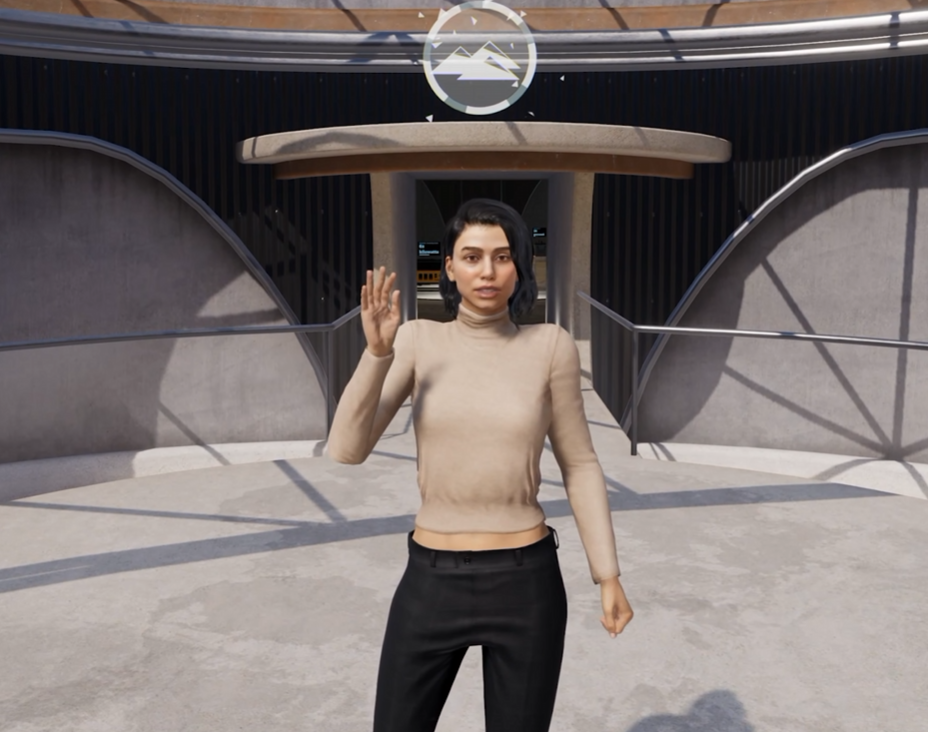
A workshop guide who walks you where you need to go and operates the room on request:
"Can you guide me to it?" "Right this way."
"Have you reset the components here? Could you perhaps walk me through it?" "I've reset the bench to step one. Do you want the whole build run through or one step at a time?"
The same pattern covers onboarding characters that give virtual tours, training instructors who point at the equipment they're describing, and AI companions that respond to their surroundings in real time.
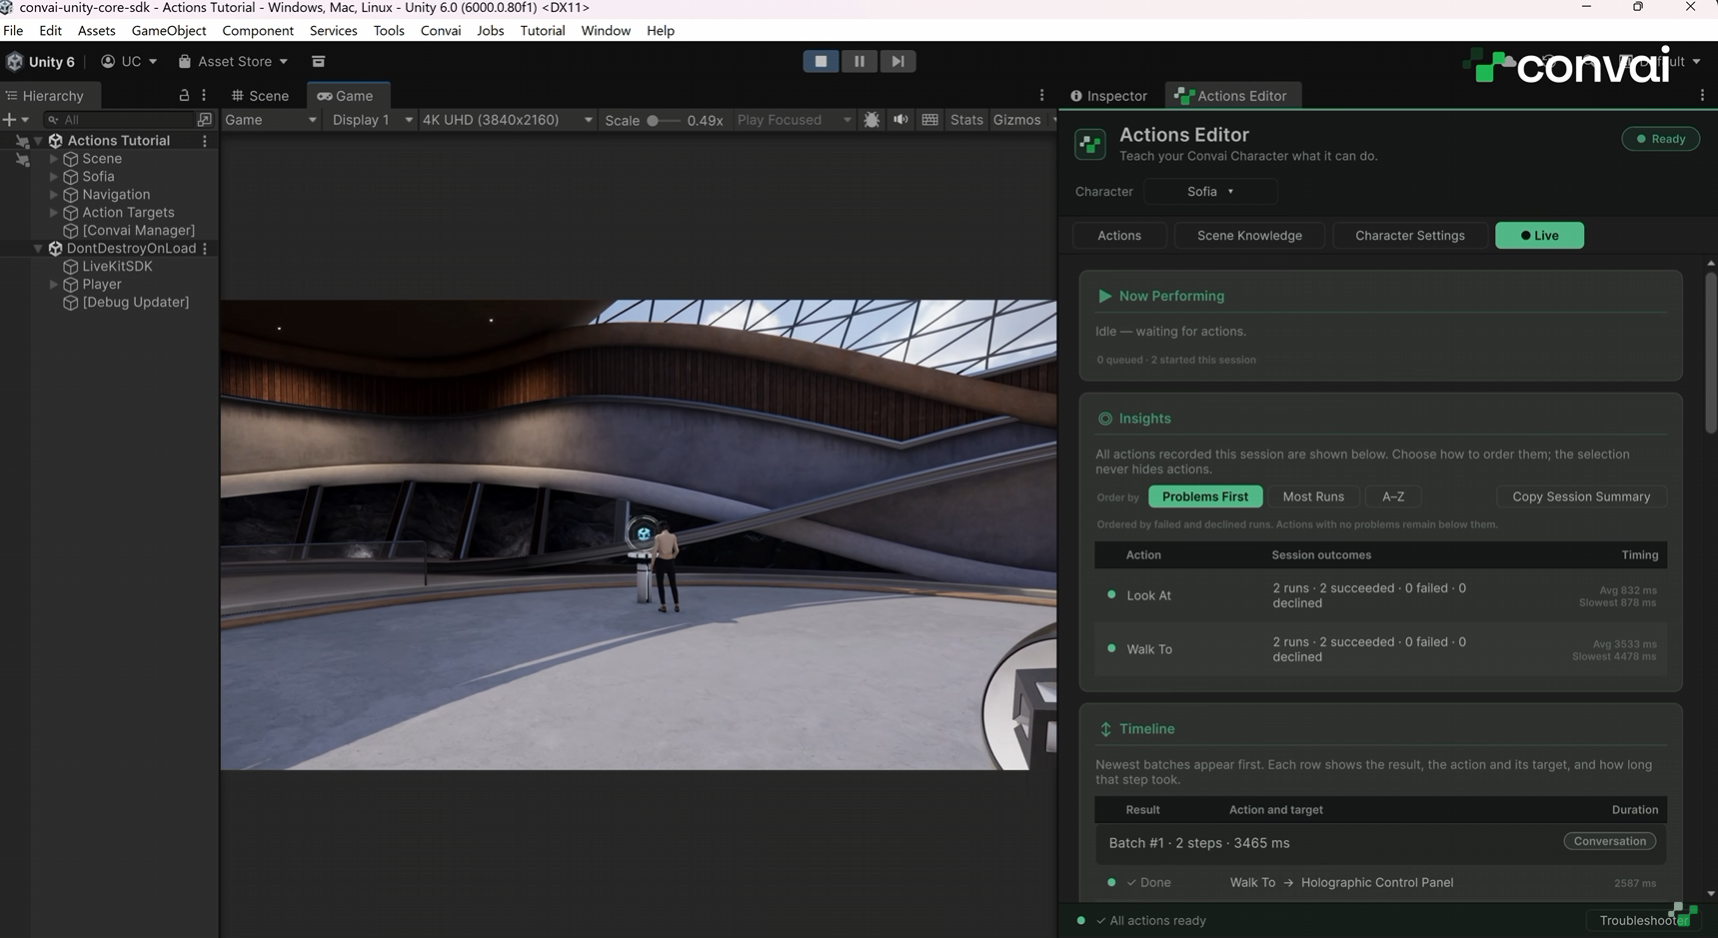
Convai splits the job in two. The backend decides which action to run and what to target, working from the actions and objects your character registered. Unity carries out the behavior, which is what turns a conversational NPC into one that participates in the scene.
A request travels through six stages. The player speaks, Convai identifies the action and target, the Convai Character component receives a command batch, the dispatcher resolves the target to a real GameObject and looks up the matching definition, it checks the speech gate on the first step, and the bound executor runs the behavior in your scene.
That speech gate is worth knowing about. When a step opts into it, the dispatcher waits for the character to start speaking, stop speaking, or finish its turn before running the action, so the character doesn't walk away mid-sentence. A timeout caps that wait at two seconds by default, so a batch never stalls if no speech event fires.
The Actions Editor is where you author all of this. It carries a catalog of 21 built-in executors, and you can write your own for project-specific behavior.
Select your Convai character in the Hierarchy, click Add Component in the Inspector, search for Convai Actions, and add it. This is the action configuration source that authors what the character is allowed to do.
The component reports a couple of issues right away, because the Action Runner isn't in place yet.
Two paths get you there. Click Add Component again, search for Convai Action Runner, and add it by hand. Or click the reported issue to open the Convai Troubleshooter and choose Set Up Action Running, which configures the component for you.
The Action Runner is the dispatcher, and it's optional in the strict sense. If you'd rather handle command batches in your own gameplay code, subscribe to the character's actions-received event and skip the dispatcher. Most projects want it.
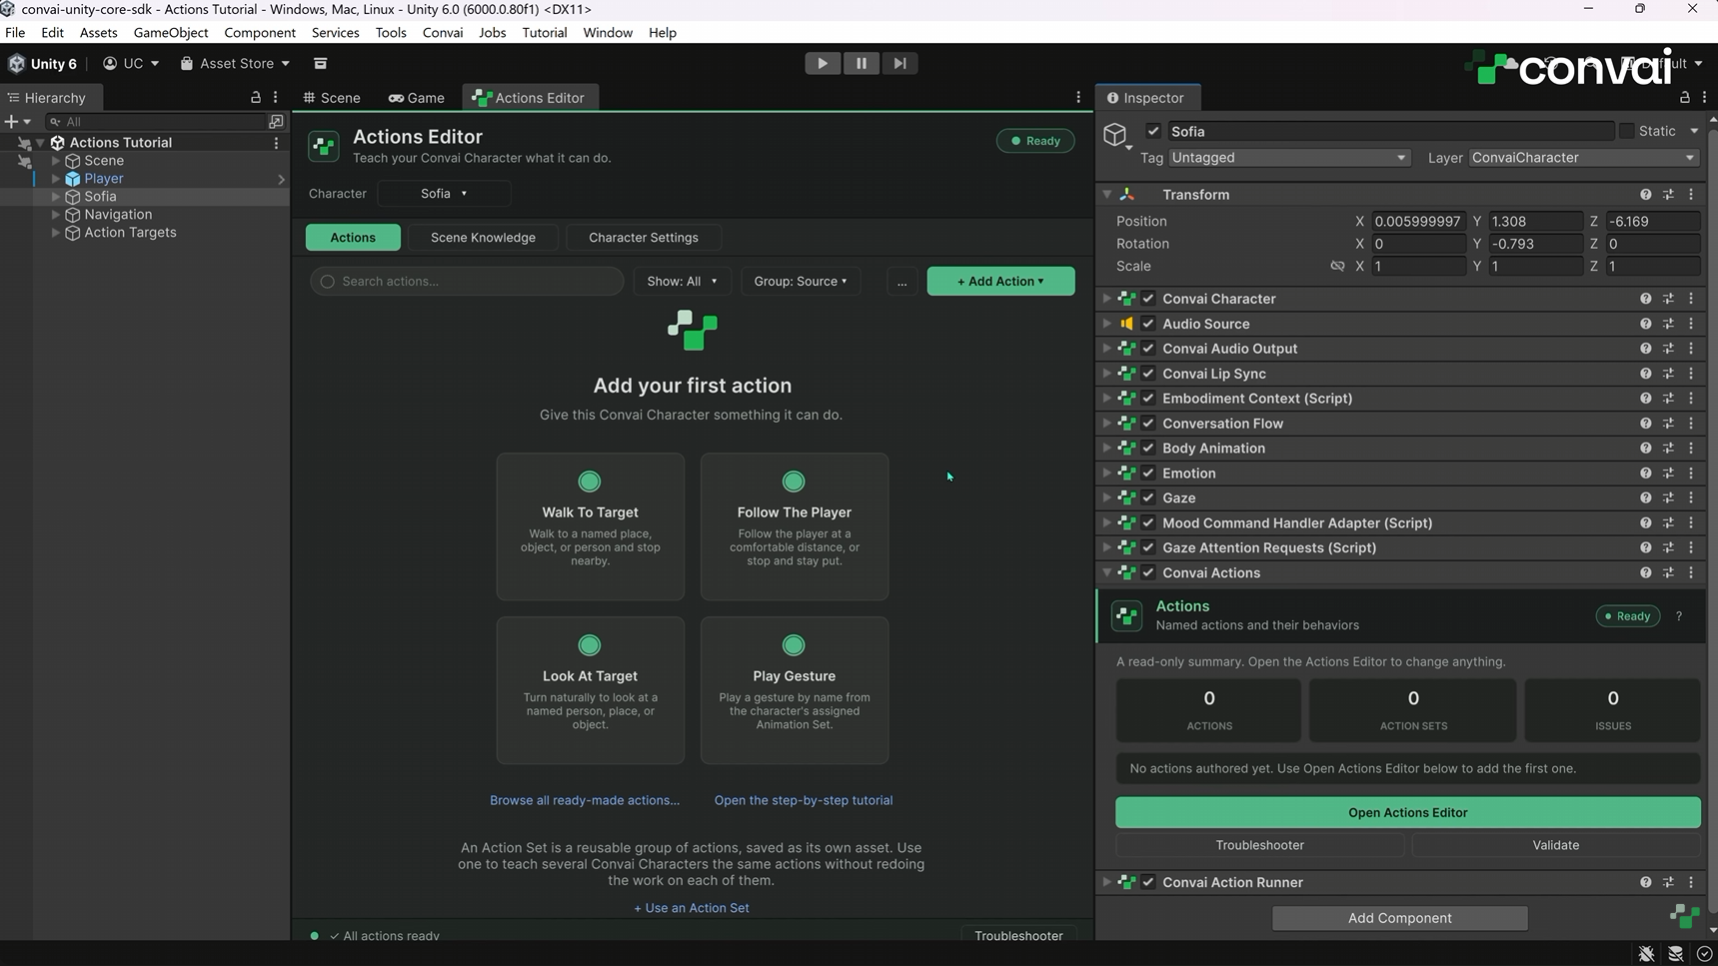
Click Open Actions Editor, and dock the window somewhere you can see it while you work. You can also reach it from Convai > Actions Editor, where the Character field auto-selects the scene's only Convai character.
A character with no actions yet shows an "Add your first action" panel with four starter cards: Walk To Target, Follow The Player, Look At Target, and Play Gesture. The tutorial picks Follow The Player.
One click does more than add an action. Convai builds the action definition from the executor's archetype, adds the executor component to the character, and adds any peer component that executor needs, all as a single undoable step. Follow The Player brings in a NavMesh Agent and locomotion. Look At Target brings in the gaze controller. Play Gesture brings in the body animation controller, both of which come from the embodiment modules.
The action arrives with its Name and Description filled in, and those fields matter more than they look. Convai reads them to work out when and how the action should be used, so a vague description produces a character that reaches for the wrong action.
Below that sit the success and failure behaviors. Failure defaults to Narrate in Character, so the character explains what went wrong in its own voice. Success defaults to Silent, so it acts without commentary. Change either one to match the experience you want.
Follow The Player needs no target of its own. It follows whichever GameObject carries the Convai Player component, so make sure that component sits on the object that moves through your scene.
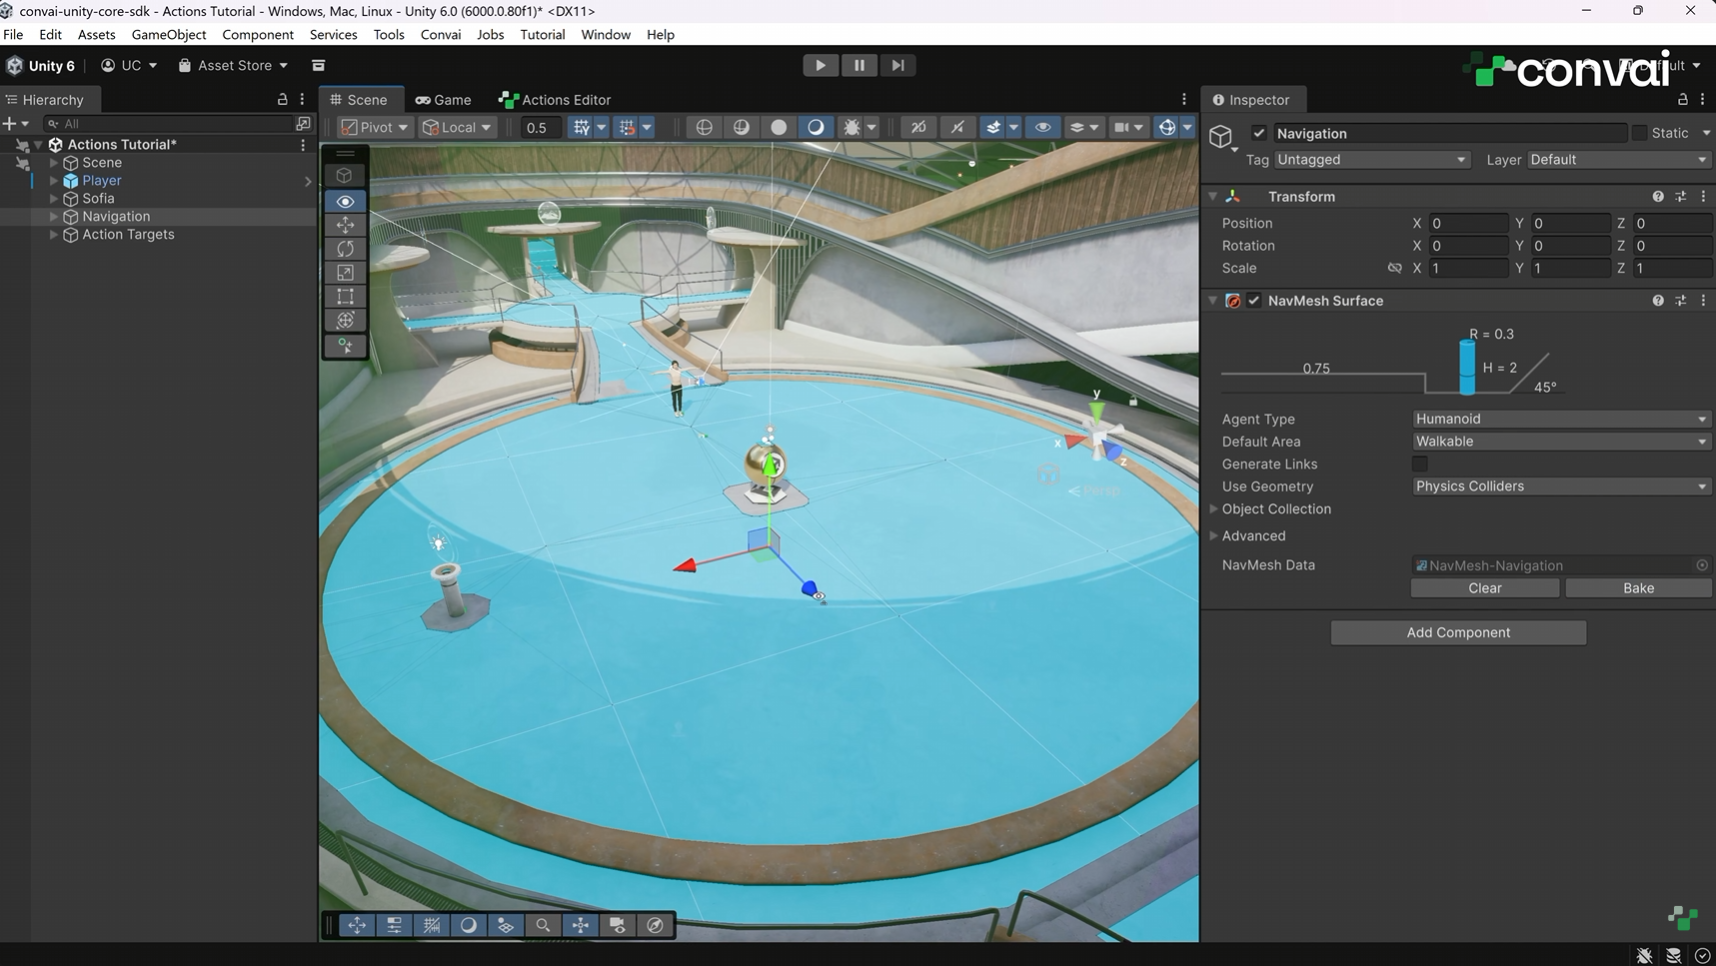
Any action involving locomotion, meaning Follow The Player or Walk To, needs a NavMesh in the scene for pathfinding. Add a NavMesh Surface to the ground your character walks on and bake it, which you'll find under Window > AI > Navigation.
Your character also needs a NavMesh Agent component, and the Actions Editor adds one for you when an action requires locomotion.
With the NavMesh baked, test it:
"Could you follow me for a moment?" "I'd be happy to. Lead the way."
The Actions Editor has a Live mode that switches itself on when Play mode starts. It shows the batch running right now, a timeline of recent batches, and per-action run counts, then relabels itself Session Review after you exit Play mode while the recording is still available. Editing is locked in every other mode during Play mode.
Walk To needs somewhere to walk. Click Add Action in the top right of the Actions Editor and add Walk To, and the editor tells you a target is required.
There are two ways to supply one.
Click Add Target, then Add Object, which opens the Scene Knowledge view. Drag your GameObject into the scene object section. The GameObject's name comes across on its own, and you should replace it with something clearer alongside a description.
Names and descriptions do real work here. Convai matches the words a player says against the objects you registered, so "the golden Unity sphere" gives it something to match on, while "Sphere_01" leaves the result to chance.
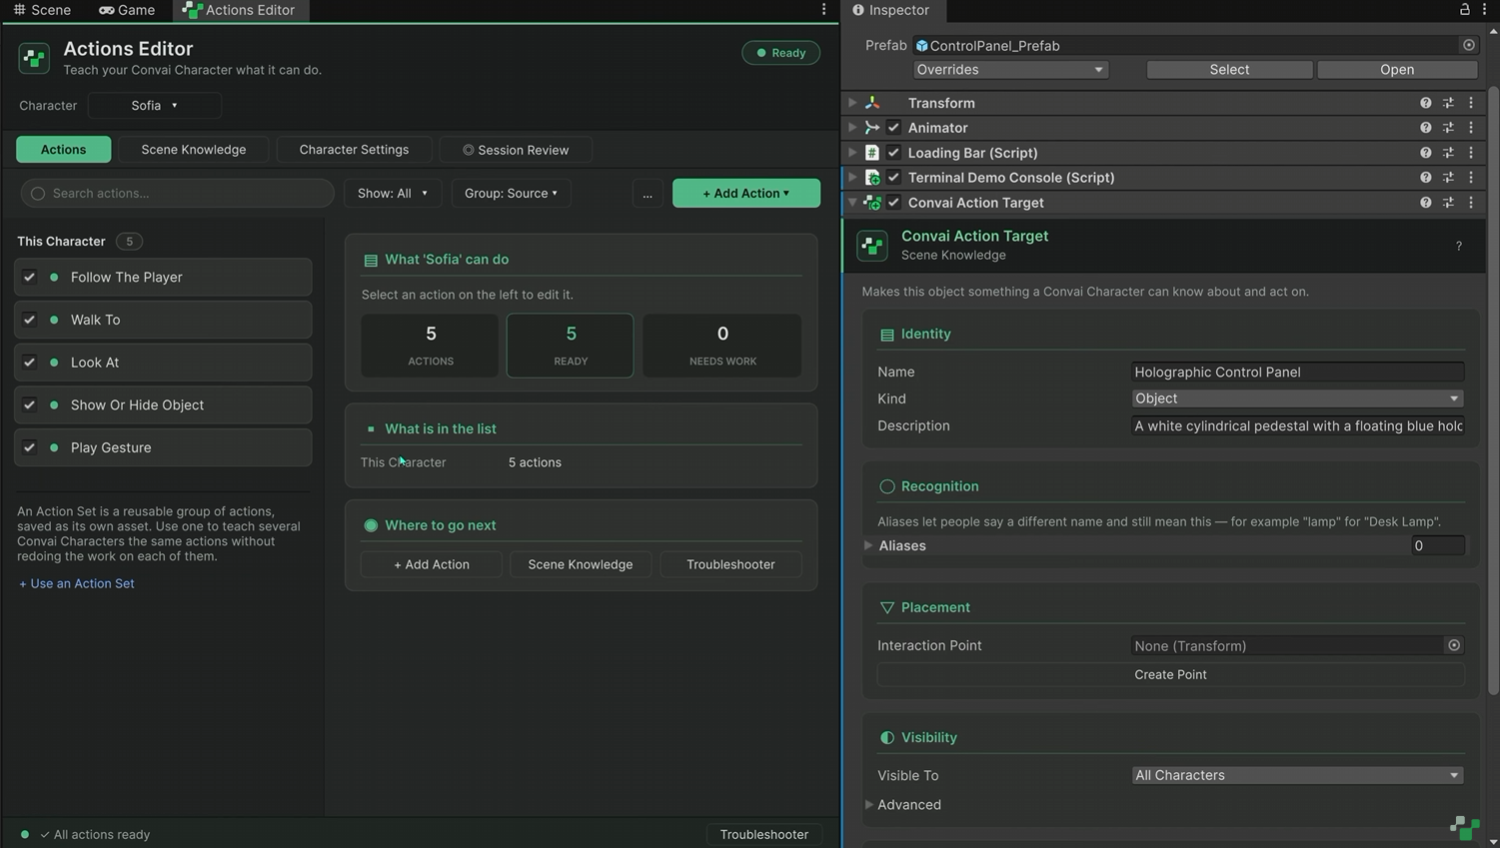
The second route puts the component on the object itself. Select the GameObject, click Add Component, search for Convai Action Target, leave Kind as Object, and give it a name and description. The tutorial does this for a control panel and names it "holographic control panel."
Back in the Actions Editor, Scene Knowledge detects GameObjects carrying that component and lists them as available targets. If one doesn't appear, run a manual scan. Confirm the object shows up in the Sent to Convai section and it's ready to use.
With targets in place, the tutorial adds three more built-in actions: Look At, Show or Hide Object, and Play Gesture.
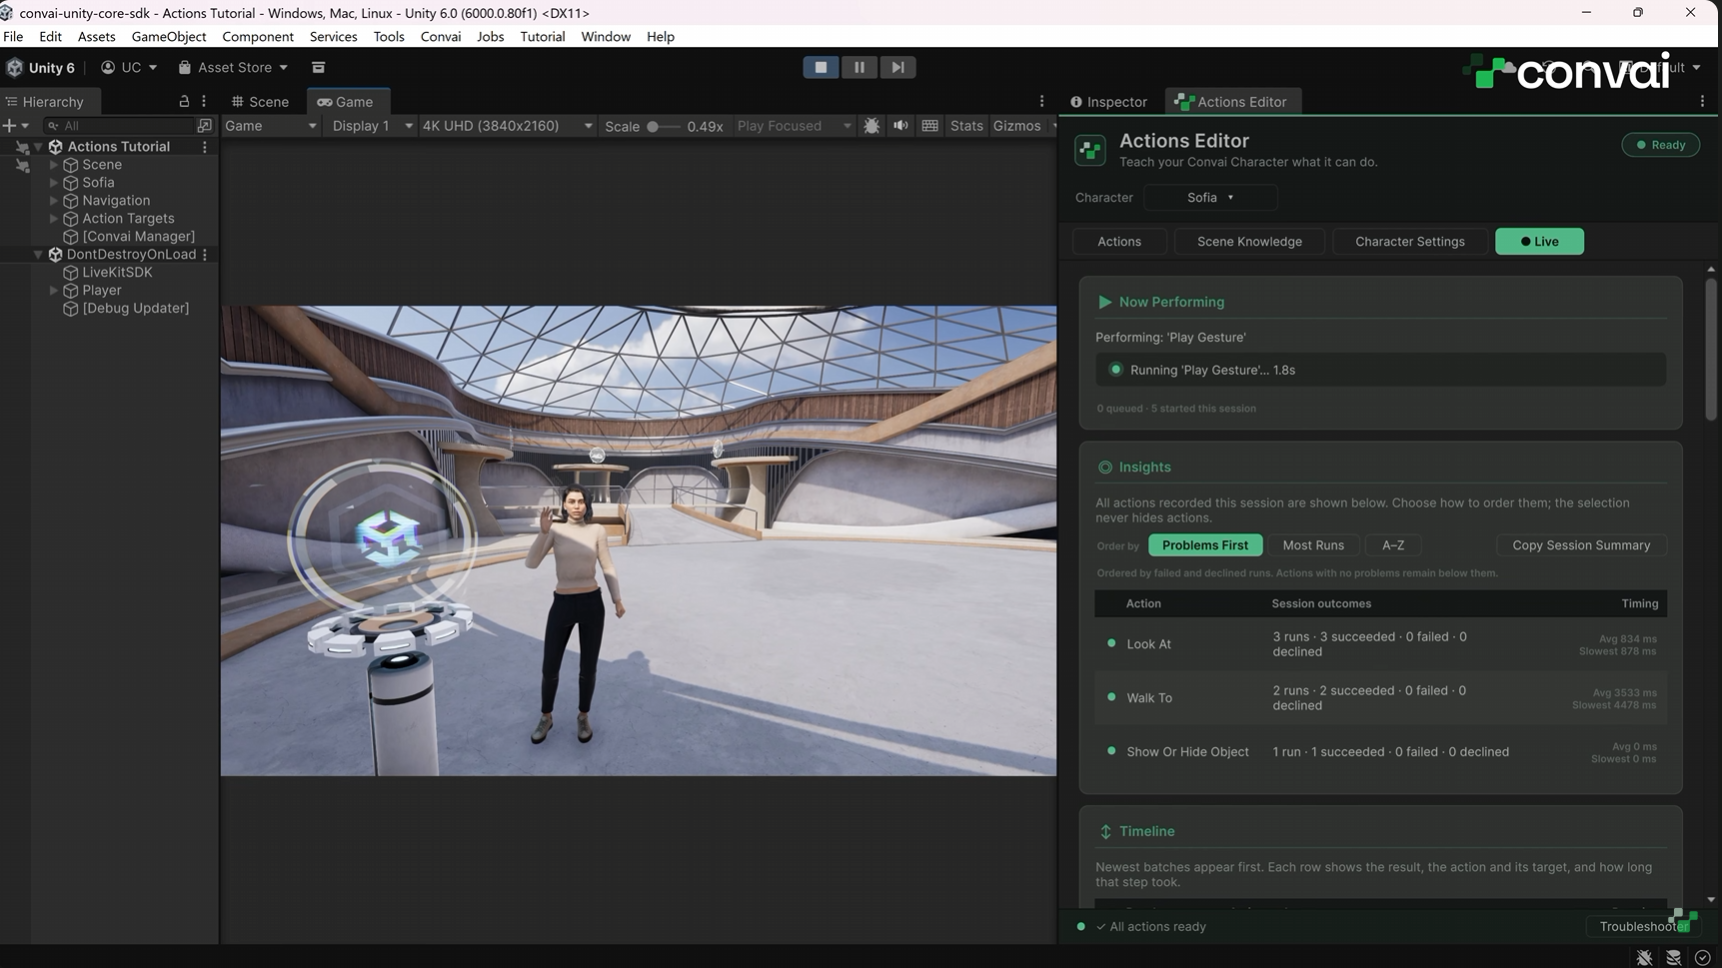
This part isn't in the video, and it will save you a lot of round trips through Play mode. Every action's detail pane carries a Try It box that runs the real dispatch path with no backend call.
In Edit mode it acts as a Preview. Type a phrase into the dry-run field and it runs against the same target-resolution ladder the runtime uses, then shows you which target it would match and at which step. That tells you whether your object names and descriptions are doing their job before you ever press Play.
In Play mode it becomes a Test Run. Pick a target from Valid Targets, fill in any parameters, and click Run Now. The run goes through the exact dispatcher path a real Convai command takes and reports success or failure with a duration, plus a reason when it fails.
For anything the Try It box doesn't explain, Convai > Troubleshooter gives a checklist-style diagnosis of the whole character in one click, and the troubleshooting reference covers the symptom and fix table.
With four actions and two targets configured, the character handles requests in sequence:
"Hey, could you please walk over to the golden Unity sphere?" "Of course. I'm happy to head over to the golden Unity sphere for you. It's a key part of our scene here."
"Now, could you look at the golden Unity sphere?" "Of course. Looking at the golden Unity sphere now. It really catches the light nicely, doesn't it?"
"You think you could hide that sphere for me?" "Of course. I've hidden the golden Unity sphere for you. Let me know if you need anything else adjusted in the scene."
Four different actions, no scripted branches, and the character keeps the conversation going through all of it.
Custom actions are the next step, where you bind your own gameplay code to an action name and let the character trigger anything your project can do. The worked examples run from no-code Inspector setup through scripted batch injection. A follow-up tutorial covers that workflow, and the Actions tutorial thread on the Convai Developer Forum collects the documentation links and is where the team works through target resolution and NavMesh questions with developers. The Unity SDK category alongside it has years of threads on character movement and targeting.
Two more things worth reading before you ship. One executor, the transform-based move-to, teleports the character with no pathfinding or animation, so keep it to prototyping and swap in the NavMesh version before players see it. And changes you make mid-session are backend-confirmed rather than instant: Unity queues the change and applies it after Convai acknowledges, discarding anything that comes back with an error.
Also read: How to Add Actions to AI Characters in Unity with Convai: Atomic, Custom, and Prompt-to-Action Guide
Also watch: Use Codex, Claude Code, or Cursor to Bring AI Characters in Unity with Convai MCP
How do I add Actions to a Convai character in Unity? Select the character, click Add Component, and add Convai Actions. Then add the Convai Action Runner, either through Add Component or by clicking the reported issue and choosing Set Up Action Running in the Convai Troubleshooter. Open the Actions Editor and pick one of the four starter actions to get your first behavior running.
What are the built-in Convai Actions in Unity? The Actions Editor ships four starter actions, Walk To Target, Follow The Player, Look At Target, and Play Gesture, backed by a catalog of 21 built-in executors covering navigation, gaze, gestures, object visibility, Unity events, and more. You can also write a custom executor for behavior specific to your project.
Why does my Convai character not move when I ask it to walk somewhere? Movement actions need a baked NavMesh. Add a NavMesh Surface to the ground your character walks on and bake it under Window, AI, Navigation. Your character also needs a NavMesh Agent, which the Actions Editor adds when an action requires locomotion. Check that the target object is registered in Scene Knowledge and appears in the Sent to Convai section.
How do I make a Unity GameObject something my AI character can interact with? Two ways. Open Scene Knowledge in the Actions Editor and drag the GameObject into the scene object section, or add the Convai Action Target component to the GameObject and set its Kind to Object. Either way, give it a clear name and description, since Convai matches what the player says against those.
Do I need to write code to use Convai Actions in Unity? No. The four starter actions and the built-in executor catalog work without scripting, and one click adds the executor plus any peer component it needs. Writing a custom executor is only necessary when you want the character to trigger behavior specific to your own project.
How do I test a Convai action without starting a conversation? Use the Try It box on the action's detail pane. In Edit mode it previews target resolution against a phrase you type, showing which target would match and at which step. In Play mode it runs the action through the real dispatcher with no backend call and reports success or failure with a duration.
What does the Convai Action Runner do? The Action Runner is the dispatcher. It receives command batches from Convai, resolves each target to a scene GameObject, looks up the matching action definition, applies the speech gate on the first step, and runs the bound executor. It's optional in principle, since you can subscribe to the character's actions-received event and handle batches in your own code.
Why does my character wait before performing an action? That's the speech gate. When a step opts into it, the dispatcher waits for the character to start speaking, stop speaking, or complete its turn before running the behavior, so the action doesn't run ahead of the voice line. A timeout caps the wait at two seconds by default.
Add the Convai Actions component, set up the Action Runner, pick a starter action, bake a NavMesh if the character needs to move, and register the objects it should know about. Then talk to it.
Ready to build? Sign up at convai.com · Read the Actions documentation · Start with the quick start · Get the plugin on the Asset Store · Ask questions on the Developer Forum
Follow Convai: LinkedIn · Reddit · X/Twitter · Instagram · YouTube


